
Vegetable Gardening
How to Grow Broccoli: A Complete Beginner’s Guide (Step-by-Step)

Introduction
The first time I tried growing broccoli, I ended up with plants that looked healthy but produced heads the size of a golf ball. I’d planted too late, fed them too much nitrogen, and had no idea the plant would punish both mistakes so clearly. That failed season taught me more about how to grow broccoli than any successful one has since, and it’s why this guide leans on real experience rather than generic advice.
How to Grow Broccoli (Featured Snippet)
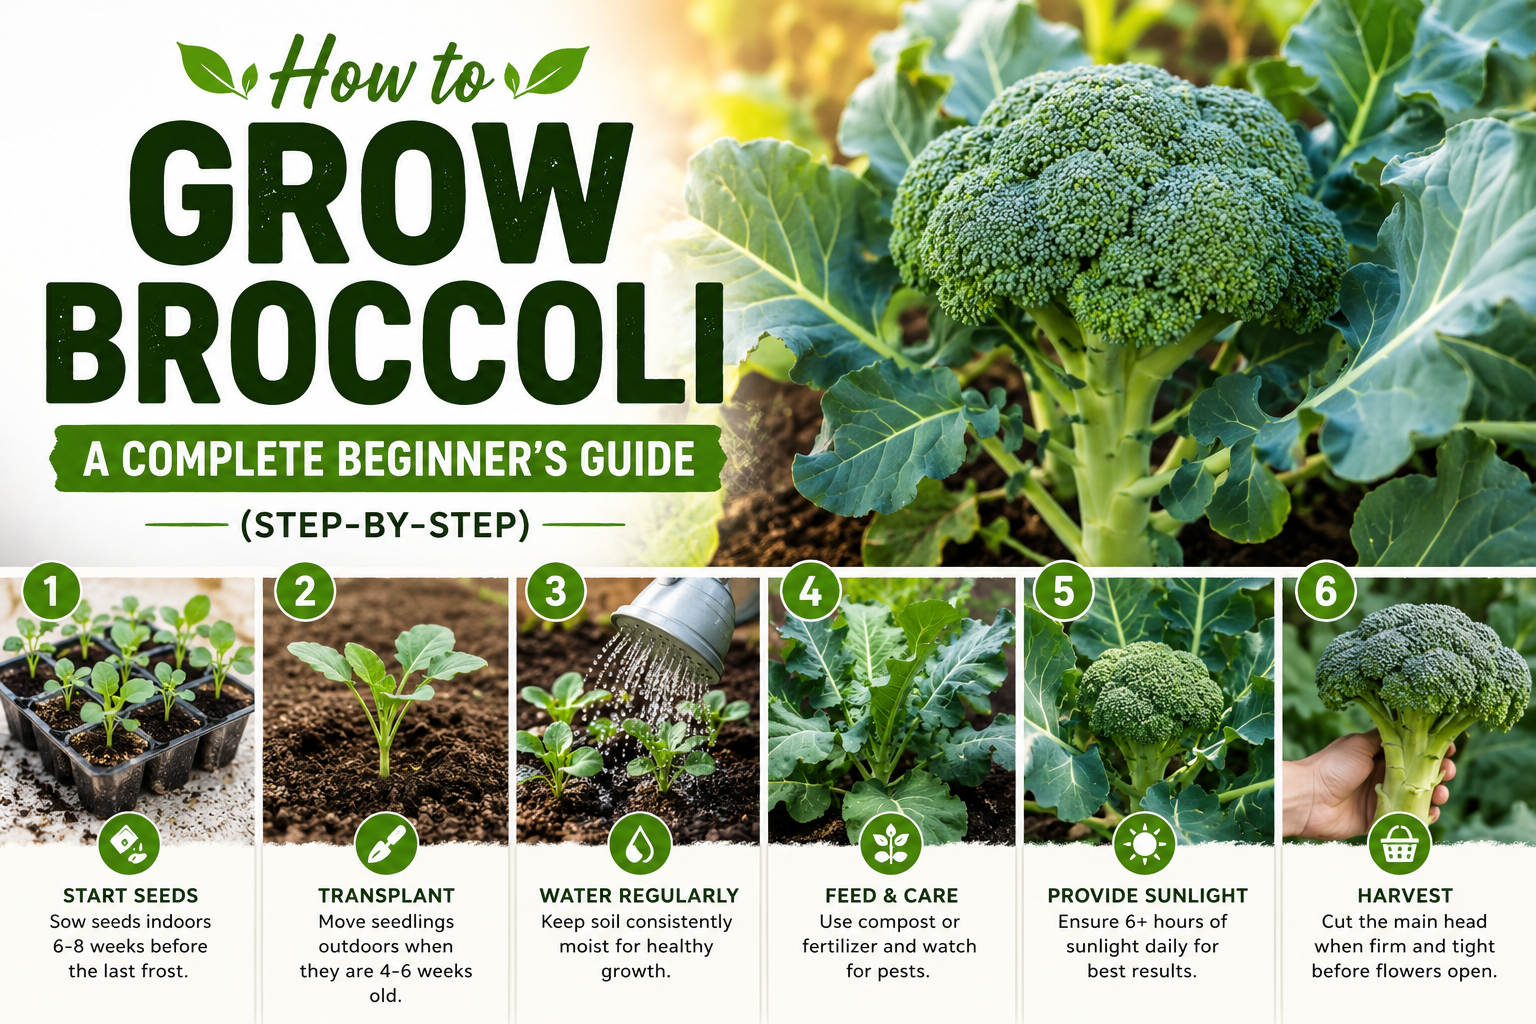
Growing broccoli well comes down to four things: cool, steady conditions during head formation, enough space between plants, even soil moisture, and restrained feeding once the plant is established. Start seedlings in advance, transplant into cool weather, space plants 18–24 inches apart, feed lightly, water deeply and evenly, and harvest as soon as the head is firm with tightly closed buds. Get those right, and broccoli is genuinely one of the easier vegetables to grow at home.
Why Grow Broccoli?
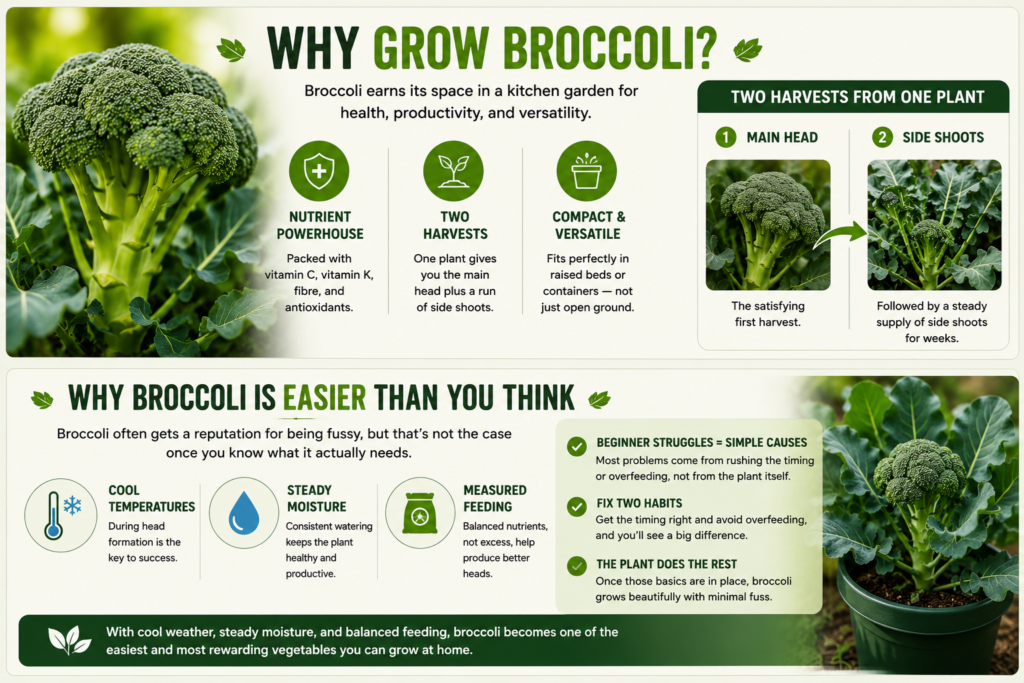
Broccoli earns its space in a kitchen garden for reasons beyond taste. It’s dense in vitamin C, vitamin K, fibre, and antioxidants, and unlike most vegetables, one plant gives you two harvests: the main head, followed by a run of smaller side shoots. Once you understand how to grow broccoli properly, it also fits a compact footprint, making it a reasonable choice for raised beds or containers, not just open ground.
Why Broccoli Is Easier Than You Think
People tend to describe broccoli as a fussy, advanced-level crop. I didn’t find that to be true once I understood what it actually wanted: cool temperatures during head formation, steady moisture, and measured feeding.
Most of the beginner struggles I’ve seen (and had myself) trace back to rushing the timing or overfeeding the plant, not to broccoli being inherently difficult. Once those two habits are fixed, the plant does most of the work on its own.
Best Broccoli Varieties for Beginners
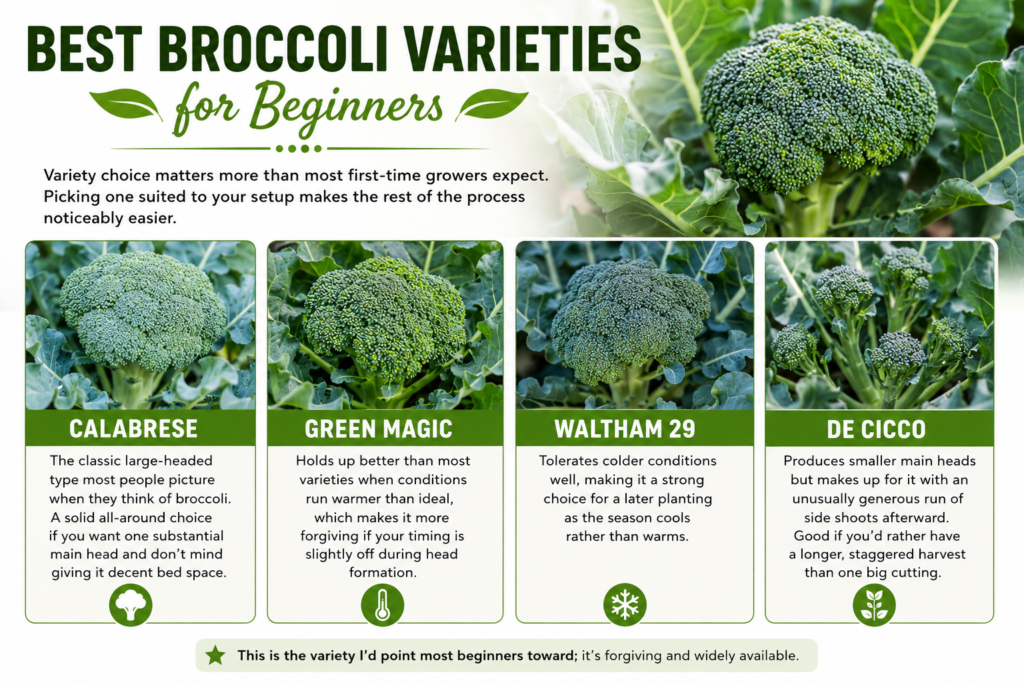
Variety choice matters more than most first-time growers expect. Picking one suited to your setup makes the rest of the process noticeably easier.
Calabrese
The classic large-headed type most people picture when they think of broccoli. A solid all-around choice if you want one substantial main head and don’t mind giving it decent bed space.
Green Magic
Holds up better than most varieties when conditions run warmer than ideal, which makes it more forgiving if your timing is slightly off during head formation.
Waltham 29
Tolerates colder conditions well, making it a strong choice for a later planting as the season cools rather than warms.
De Cicco
Produces smaller main heads but makes up for it with an unusually generous run of side shoots afterward. Good if you’d rather have a longer, staggered harvest than one big cutting. This is the variety I’d point most beginners toward; it’s forgiving and widely available.
Should You Grow Broccoli from Seed or Buy Seedlings?
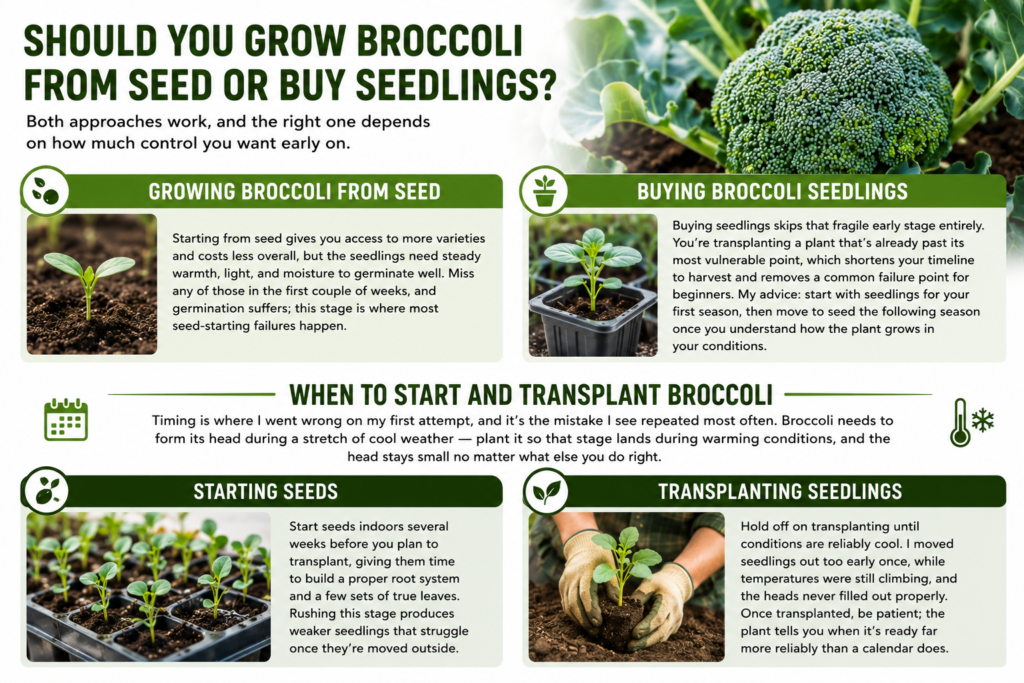
Both approaches work, and the right one depends on how much control you want early on.
Growing Broccoli from Seed
Starting from seed gives you access to more varieties and costs less overall, but the seedlings need steady warmth, light, and moisture to germinate well. Miss any of those in the first couple of weeks, and germination suffers; this stage is where most seed-starting failures happen.
Buying Broccoli Seedlings
Buying seedlings skips that fragile early stage entirely. You’re transplanting a plant that’s already past its most vulnerable point, which shortens your timeline to harvest and removes a common failure point for beginners. My advice: start with seedlings for your first season, then move to seed the following season once you understand how the plant grows in your conditions.
When to Start and Transplant Broccoli
Timing is where I went wrong on my first attempt, and it’s the mistake I see repeated most often. Broccoli needs to form its head during a stretch of cool weather; plant it so that stage lands during warming conditions, and the head stays small no matter what else you do right.
Starting Seeds
Start seeds indoors several weeks before you plan to transplant, giving them time to build a proper root system and a few sets of true leaves. Rushing this stage produces weaker seedlings that struggle once they’re moved outside.
Transplanting Seedlings
Hold off on transplanting until conditions are reliably cool. I moved seedlings out too early once, while temperatures were still climbing, and the heads never filled out properly. Once transplanted, be patient; the plant tells you when it’s ready far more reliably than a calendar does.
How Long Does It Take to Grow Broccoli?
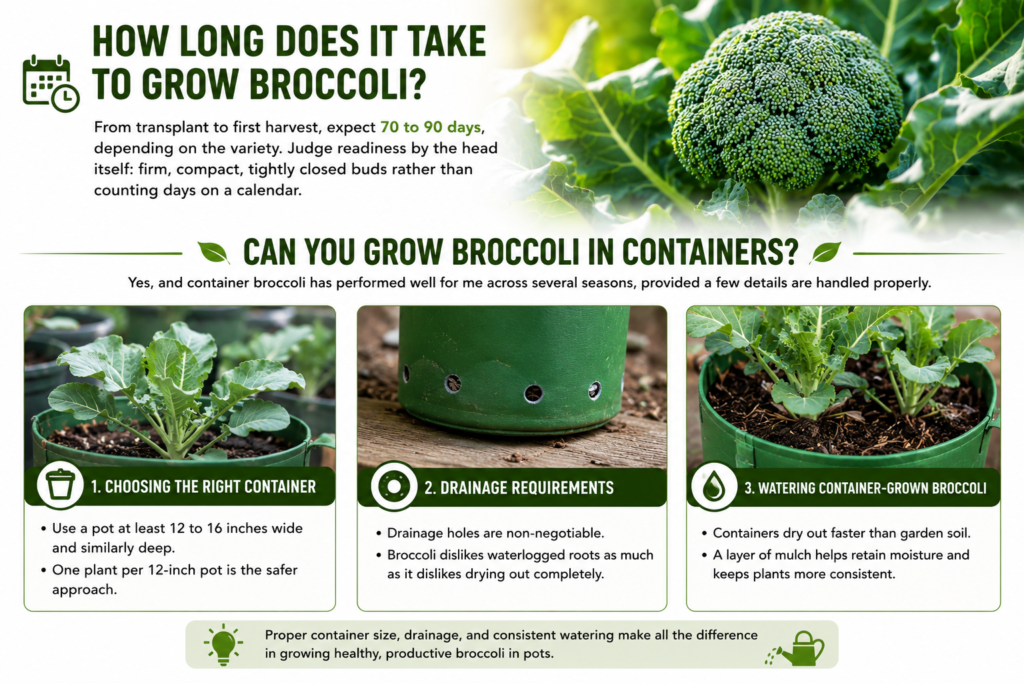
From transplant to first harvest, expect 70 to 90 days, depending on the variety. Faster-maturing types like De Cicco tend to be on the lower end of that range, while larger-headed varieties often take longer. Judge readiness by the head itself: firm, compact, tightly closed buds rather than counting days on a calendar.
Can You Grow Broccoli in Containers?
Yes, and container broccoli has performed well for me across several seasons, provided a few details are handled properly.
Choosing the Right Container
Go with a pot at least 12 to 16 inches wide and similarly deep. Broccoli’s root system needs real room, and a cramped pot shows up directly in a smaller head. One plant per 12-inch pot is the safer approach; in a larger container, keep the same spacing you’d use in a bed rather than crowding several plants in.
Drainage Requirements
Drainage holes are non-negotiable. Broccoli dislikes waterlogged roots as much as it dislikes drying out completely, and a container with poor drainage will show stress faster than an in-ground bed would.
Watering Container-Grown Broccoli
Containers dry out noticeably faster than garden soil, so check moisture more often than you would with a raised bed. A layer of mulch on top of the container soil slows moisture loss meaningfully; this mattered more for my container plants than my raised bed ones.
How Much Space Does Broccoli Need?
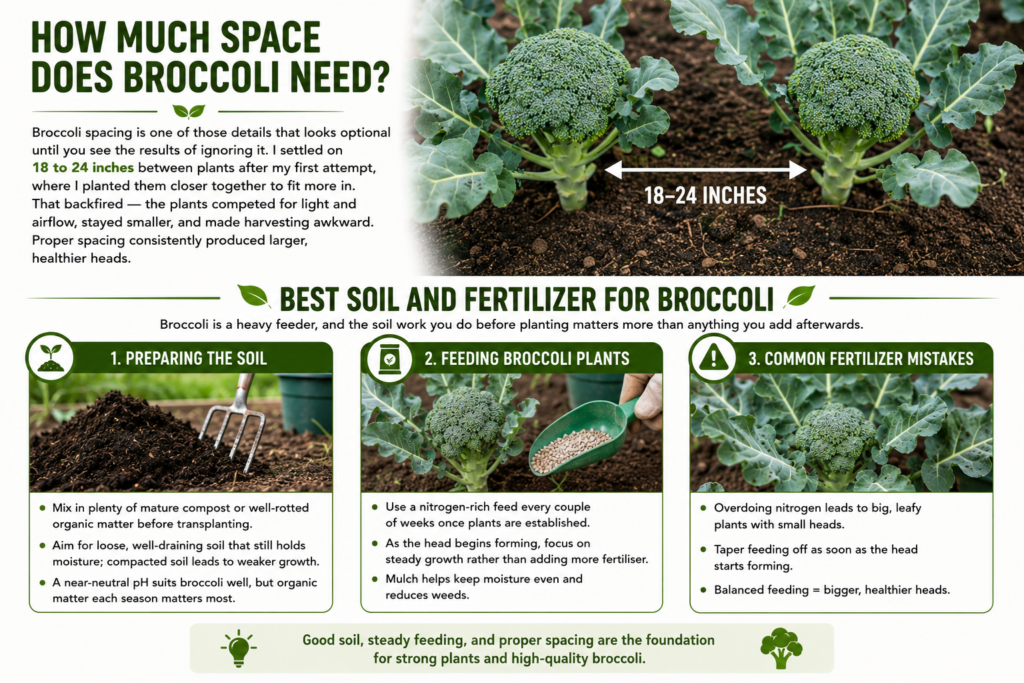
Broccoli spacing is one of those details that looks optional until you see the results of ignoring it. I settled on 18 to 24 inches between plants after my first attempt, where I planted them closer together to fit more in. That backfired — the plants competed for light and airflow, stayed smaller, and made harvesting awkward. Proper spacing consistently produced larger, healthier heads.
Best Soil and Fertilizer for Broccoli
Broccoli is a heavy feeder, and the soil work you do before planting matters more than anything you add afterwards.
Preparing the Soil
Mix in plenty of mature compost or well-rotted organic matter before transplanting — this builds fertility into the soil from the start rather than correcting for it later. Aim for loose, well-draining soil that still holds moisture; compacted soil consistently produced weaker growth in my experience. A near-neutral pH suits broccoli well, though building organic matter into the soil each season did more for plant health than chasing an exact number.
Feeding Broccoli Plants
Once plants are established, a nitrogen-rich feed every couple of weeks supports leafy growth. As the plant matures and the head begins forming, shift toward keeping growth steady rather than adding more fertiliser. A layer of mulch once plants are established also helps by keeping moisture even and cutting down on weeds.
Common Fertilizer Mistakes
This is where I made my biggest mistake. On one crop, I overdid the nitrogen and ended up with huge, healthy-looking leaves and disappointingly small heads. Since then, I taper feeding off as soon as the head starts forming.
Watering Broccoli the Right Way
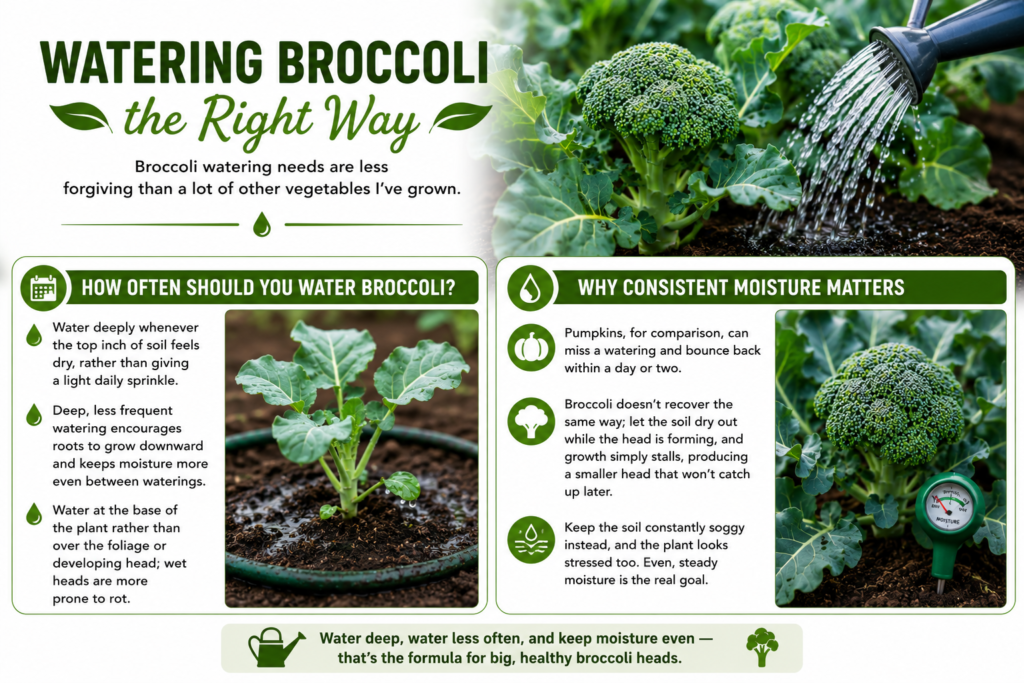
Broccoli watering needs are less forgiving than a lot of other vegetables I’ve grown.
How Often Should You Water Broccoli?
Water deeply whenever the top inch of soil feels dry, rather than giving a light daily sprinkle. Deep, less frequent watering encourages roots to grow downward and keeps moisture more even between waterings. Water at the base of the plant rather than over the foliage or developing head; wet heads are more prone to rot.
Why Consistent Moisture Matters
Pumpkins, for comparison, can miss a watering and bounce back within a day or two. Broccoli doesn’t recover the same way; let the soil dry out while the head is forming, and growth simply stalls, producing a smaller head that won’t catch up later. Keep the soil constantly soggy instead, and the plant looks stressed too. Even, steady moisture is the real goal.
Best Companion Plants for Broccoli
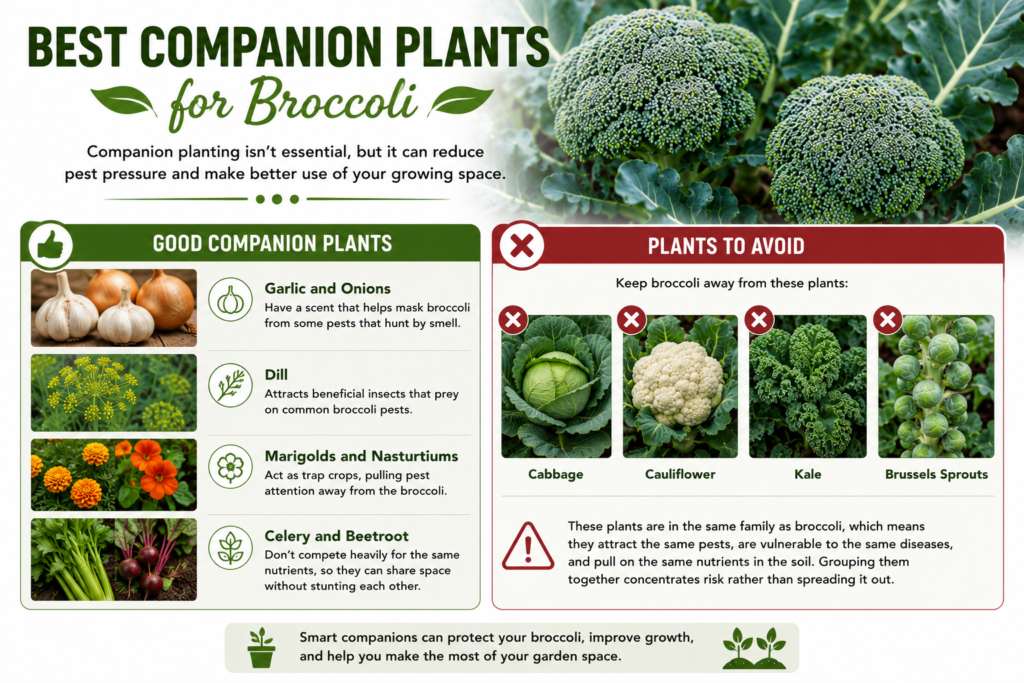
Companion planting isn’t essential, but it can reduce pest pressure and make better use of your growing space.
Good Companion Plants
Garlic and onions have a scent that helps mask broccoli from some pests that hunt by smell. Dill attracts beneficial insects that prey on common broccoli pests. Marigolds and nasturtiums act as trap crops, pulling pest attention away from the broccoli itself. Celery and beetroot round out the list well — neither competes heavily for the same nutrients broccoli draws on, so they can share space without stunting each other.
Plants to Avoid
Keep broccoli away from cabbage, cauliflower, kale, and Brussels sprouts. All of these are in the same family as broccoli, which means they attract the same pests, are vulnerable to the same diseases, and pull on the same nutrients in the soil. Grouping them concentrates risk rather than spreading it out.
Common Broccoli Problems and Solutions
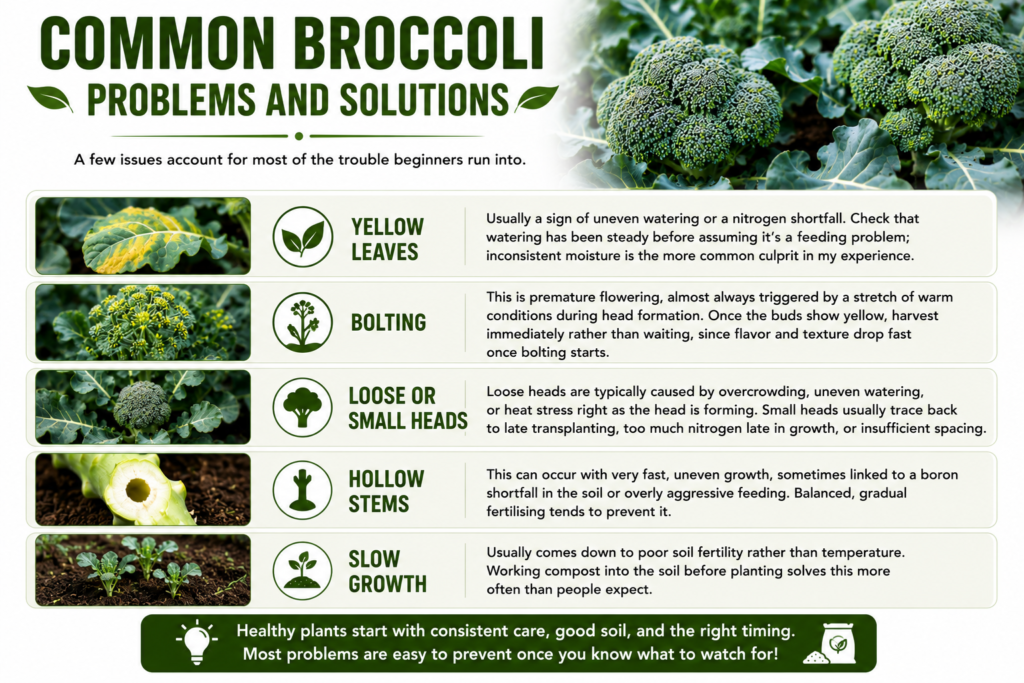
A few issues account for most of the trouble beginners run into.
Yellow Leaves
Usually a sign of uneven watering or a nitrogen shortfall. Check that watering has been steady before assuming it’s a feeding problem; inconsistent moisture is the more common culprit in my experience.
Bolting
This is premature flowering, almost always triggered by a stretch of warm conditions during head formation. Once the buds show yellow, harvest immediately rather than waiting, since flavour and texture drop fast once bolting starts.
Loose or Small Heads
Loose heads are typically caused by overcrowding, uneven watering, or heat stress right as the head is forming. Small heads usually trace back to late transplanting, too much nitrogen late in growth, or insufficient spacing.
Hollow Stems
This can occur with very fast, uneven growth, sometimes linked to a boron shortfall in the soil or overly aggressive feeding. Balanced, gradual fertilising tends to prevent it.
Slow Growth
Usually comes down to poor soil fertility rather than temperature. Working compost into the soil before planting solves this more often than people expect.
Common Broccoli Pests and Diseases
Aphids
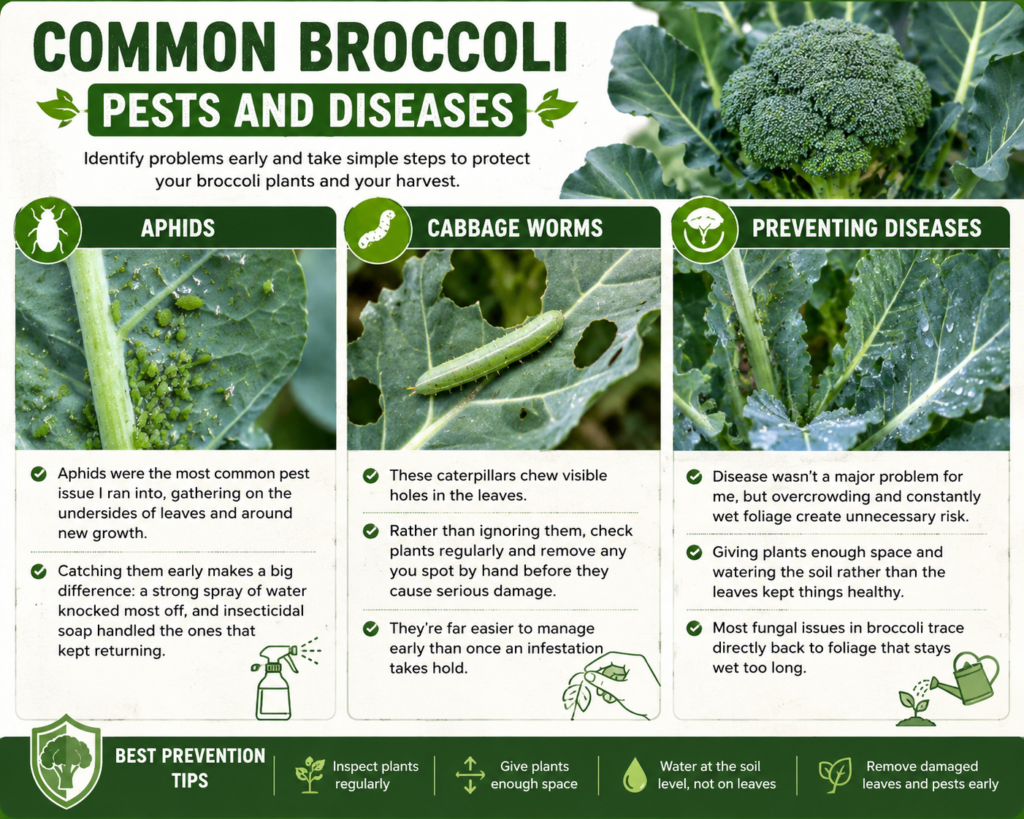
Aphids were the most common pest issue I ran into, gathering on the undersides of leaves and around new growth. Catching them early makes a big difference: a strong spray of water knocked most off, and insecticidal soap handled the ones that kept returning.
Cabbage Worms
These caterpillars chew visible holes in the leaves. Rather than ignoring them, check plants regularly and remove any you spot by hand before they cause serious damage; they’re far easier to manage early than once an infestation takes hold.
Preventing Diseases
Disease wasn’t a major problem for me, but overcrowding and constantly wet foliage create unnecessary risk. Giving plants enough space and watering the soil rather than the leaves kept things healthy. Most fungal issues in broccoli trace directly back to foliage that stays wet too long.
How to Harvest Broccoli
When to Harvest
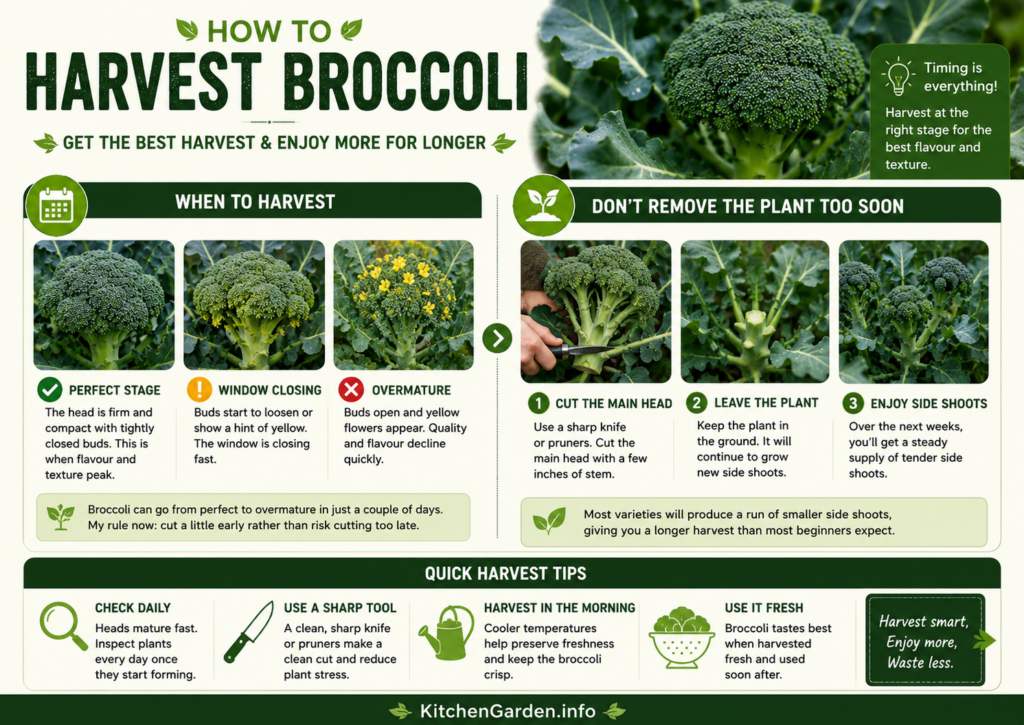
The perfect harvest stage is narrower than most beginners expect. The main head should feel firm and compact, with every bud still tightly closed; that’s the point where flavour and texture peak. Once buds start to loosen or show any hint of yellow, the window is closing fast; broccoli can go from ideal to overmature within a couple of days.
I learned this the hard way, assuming a head would keep improving if I left it a few extra days. Twice, that assumption cost me the best part of the harvest. My rule now: cut a little early rather than risk cutting too late.
Don’t Remove the Plant Too Soon
Leave the plant in the ground after cutting the main head. Most varieties will produce a run of smaller side shoots over the following weeks, giving you a longer harvest than most beginners expect. One of my best seasons wasn’t the one with the largest single head; it was the season I left the plants in place and let the side shoots keep coming, which pushed the total harvest well past what one head would have given me.
How to Store Fresh Broccoli?
Freshly cut broccoli doesn’t hold quality for long, so plan for it soon after harvest.
Refrigerating Fresh Broccoli
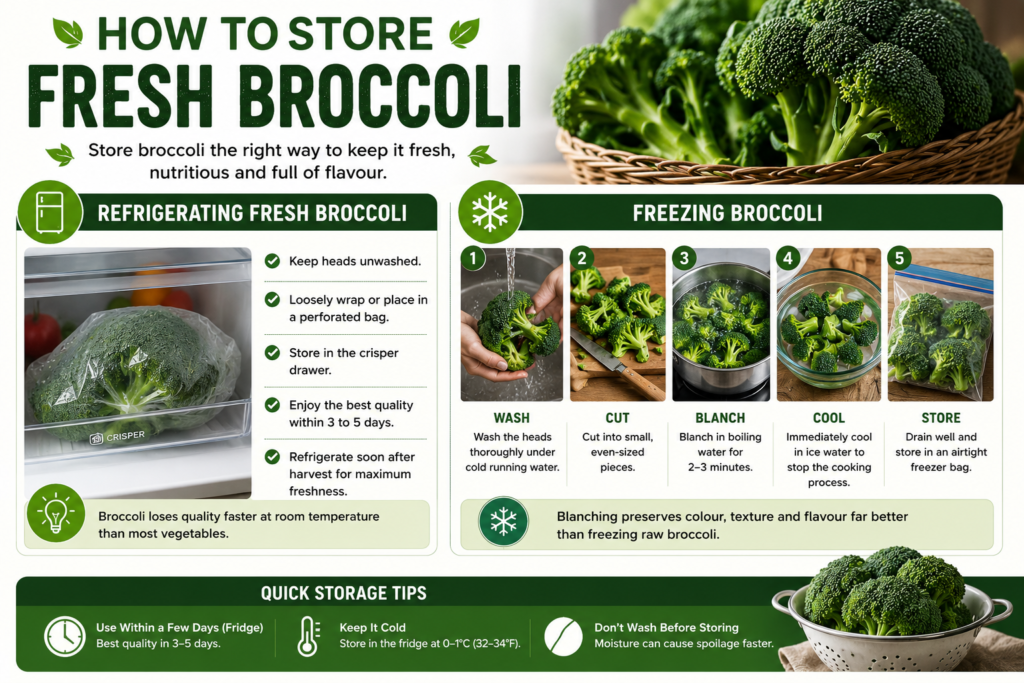
Keep heads unwashed, loosely wrapped or in a perforated bag, in the crisper drawer. Expect roughly three to five days before quality drops noticeably. Broccoli loses quality faster at room temperature than most vegetables, so refrigerate it soon after cutting if you won’t use it the same day.
Freezing Broccoli
Wash the heads, cut into pieces, and blanch briefly in boiling water before cooling quickly and transferring to an airtight freezer bag. Blanching is the step people skip and shouldn’t — it preserves colour, texture, and flavour far better than freezing raw broccoli.
Tools You Actually Need
Growing broccoli doesn’t call for specialised equipment. What’s actually mattered across my seasons growing it: a hand trowel, a watering can or hose with a gentle spray setting, a sharp knife or clean pruning shears for harvesting, and a layer of organic mulch. Good soil and regular attention outperform any tool you could buy.
Frequently Asked Questions
How long does broccoli take to grow?
Typically 70 to 90 days from transplant to first harvest, depending on the variety. Judge readiness by the firmness of the head rather than the calendar.
Why are my broccoli heads small?
The most common causes are late transplanting into warming conditions, overcrowding, or too much nitrogen fertiliser late in growth, which pushes leaf growth at the expense of the head.
Why is my broccoli flowering early?
This is bolting, usually triggered by warm conditions during head formation. Once it starts, harvest immediately rather than waiting for the head to grow further.
Can broccoli grow in containers?
Yes. Use a container at least 12 to 16 inches wide with good drainage, one plant per 12-inch pot, and check soil moisture more frequently than you would in a garden bed.
Can I harvest broccoli more than once?
Yes. Leave the plant in the ground after cutting the main head, and most varieties will produce smaller side shoots over the following weeks.
Is broccoli difficult for beginners?
Not particularly. Learning how to grow broccoli mainly comes down to fertile soil, correct spacing, even watering, and avoiding excess nitrogen, not any special skill or experience.
Final Thoughts
Broccoli rewards attention more than effort. The plants that did best for me weren’t the ones I fussed over constantly; they were the ones I gave steady conditions and then largely left alone: fertile soil prepared ahead of time, even watering, proper spacing, and restrained feeding. If you take one thing from this guide on how to grow broccoli, let it be this: avoid the handful of mistakes that trip up most beginners, and the plant does the rest.
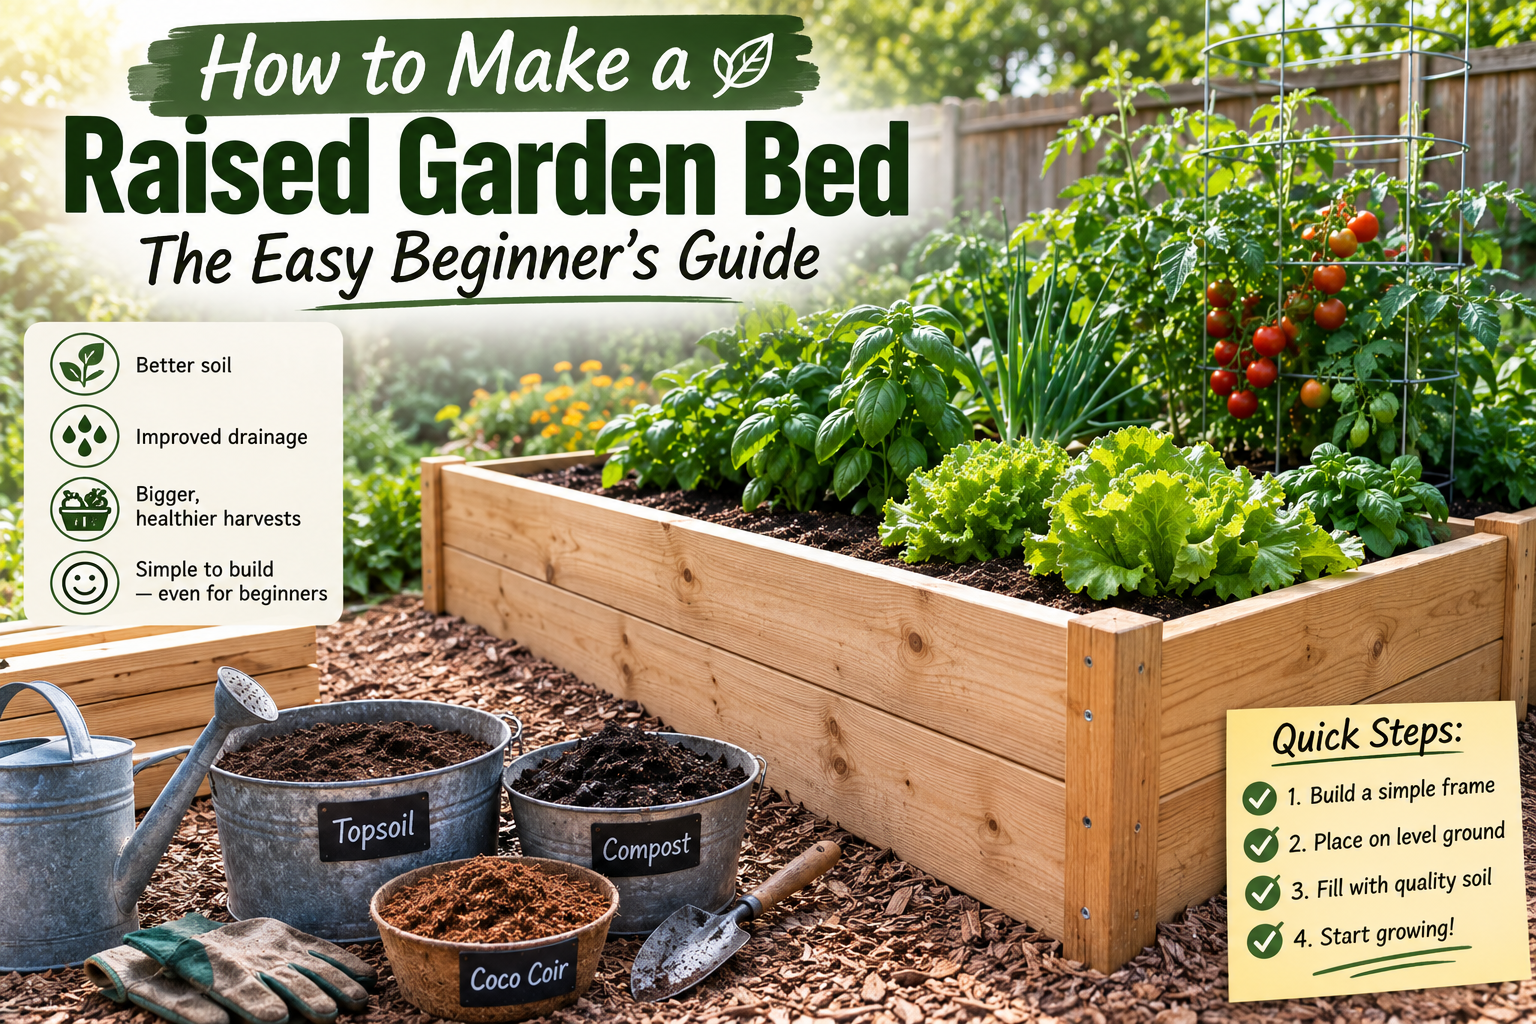
If you’ve ever tried to grow vegetables in poor, compacted soil that drains badly no matter what you do, you already understand why so many gardeners eventually turn to raised beds. Learning how to make a raised garden bed is one of the simplest ways to take control of your soil, your drainage, and ultimately your harvest without needing a lot of tools or gardening experience.
I started building raised beds after struggling with exactly that problem. My in-ground soil stayed compact and waterlogged no matter how much I amended it, and my vegetables never grew the way I hoped. Switching to a raised bed changed that almost immediately, though I made plenty of mistakes along the way that I’ll walk you through here.
This guide covers everything a beginner actually needs: choosing raised bed materials, picking the right size and location, building the frame, mixing the soil, and avoiding the mistakes that trip up most first-timers.
Featured Snippet
How to make a raised garden bed: build a simple rectangular frame from untreated wood or another food-safe material, set it on level ground with 6–8 hours of daily sun, then fill it with a mix of topsoil, compost, and coco coir. Keep the bed about 4 feet wide so you can reach the center without stepping in.
Why Build a Raised Garden Bed
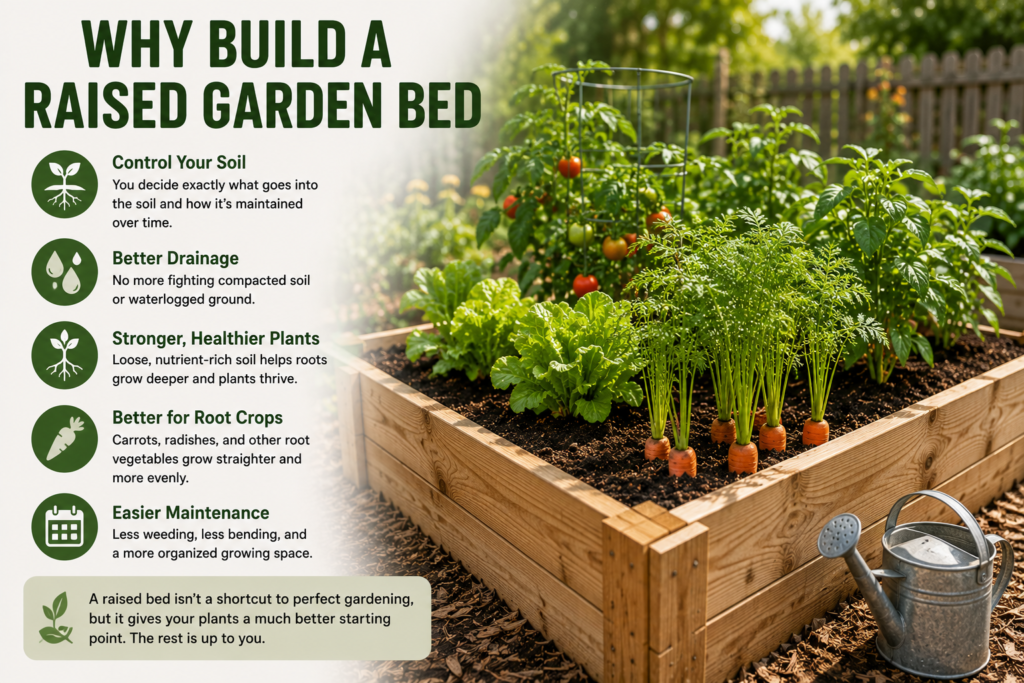
A raised bed gives you something in-ground gardening often can’t: complete control over your soil. Instead of fighting compacted native ground or poor drainage, you decide exactly what goes into the soil and how it’s maintained over time.
That control is the real advantage. Plants get loose, well-draining soil to grow in from day one, which makes a noticeable difference for root crops in particular. Carrots, for example, grow straighter and more evenly in loose raised-bed soil than they typically do in compacted garden ground.
Raised beds aren’t a shortcut to perfect gardening, though. You’ll still need to choose the right crops for the season, water consistently, and keep the soil healthy. What a raised bed does is give your plants a much better starting point; the rest is still up to you.
Before You Start: A Quick Raised Bed Checklist
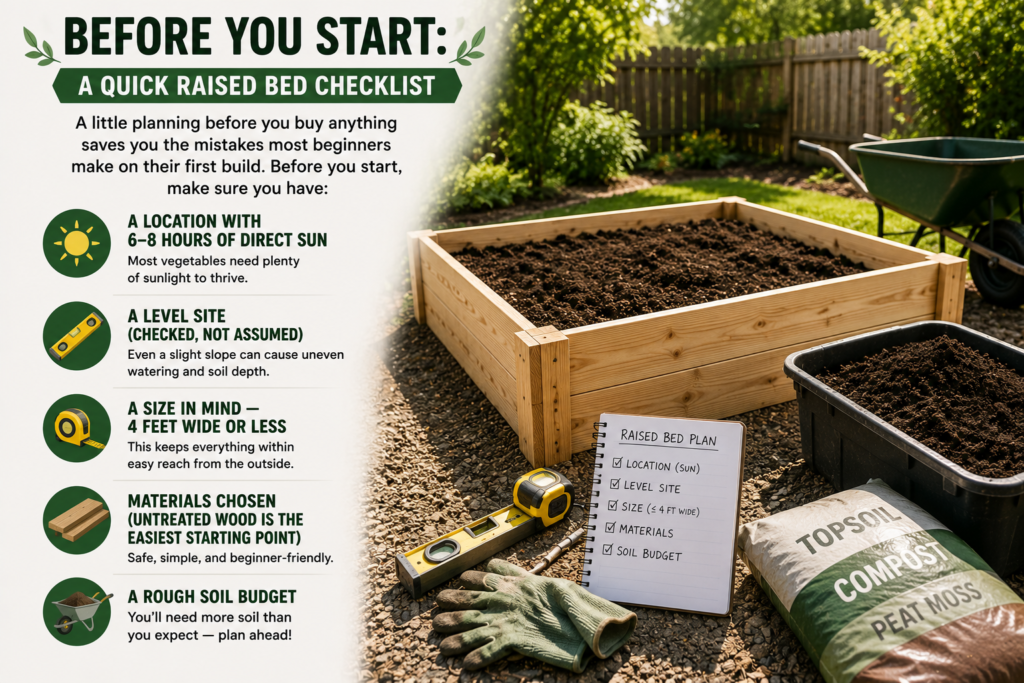
A little planning before you buy anything saves you the mistakes most beginners make on their first build. Before you start, make sure you have:
- A location with 6–8 hours of direct sun
- A level site (checked, not assumed)
- A size in mind — 4 feet wide or less, so you never need to step inside
- Materials chosen (untreated wood is the easiest starting point)
- A rough soil budget, since you’ll need more than you expect
Choosing the Right Location for Your Raised Bed
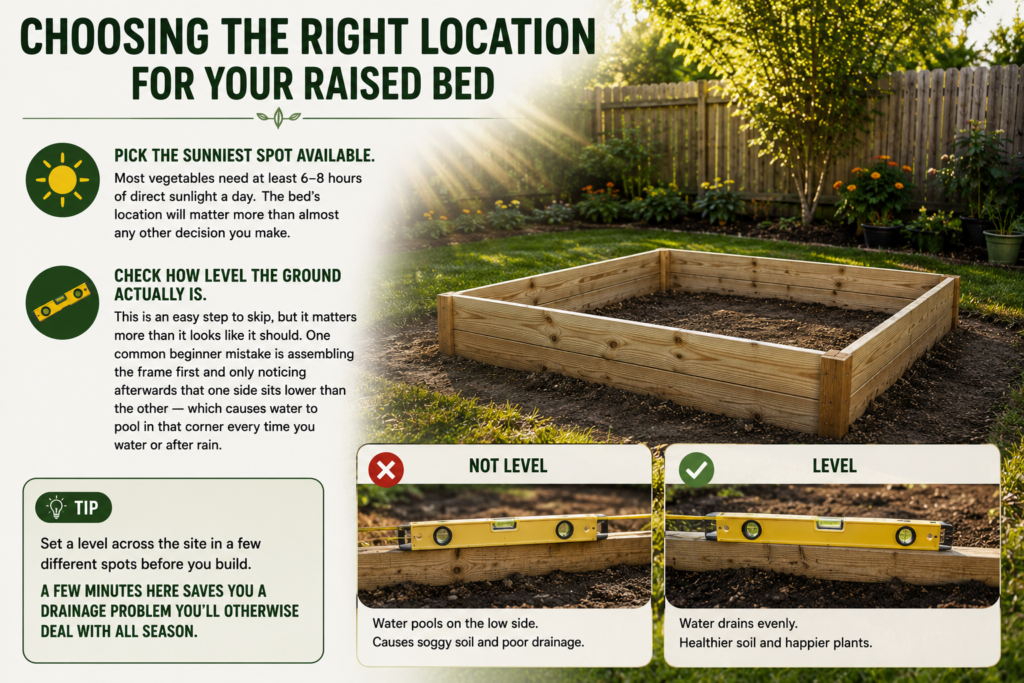
Pick the sunniest spot available. Most vegetables need at least 6–8 hours of direct sunlight a day, and the bed’s location will matter more than almost any other decision you make.
Before you build anything, check how level the ground actually is. This is an easy step to skip, but it matters more than it looks like it should. One common beginner mistake is assembling the frame first and only noticing afterwards that one side sits lower than the other, which causes water to pool in that corner every time you water or after rain.
Tip: Set a level across the site in a few different spots before you build. A few minutes here saves you a drainage problem you’ll otherwise deal with all season.
Choosing the Best Materials for a Raised Garden Bed
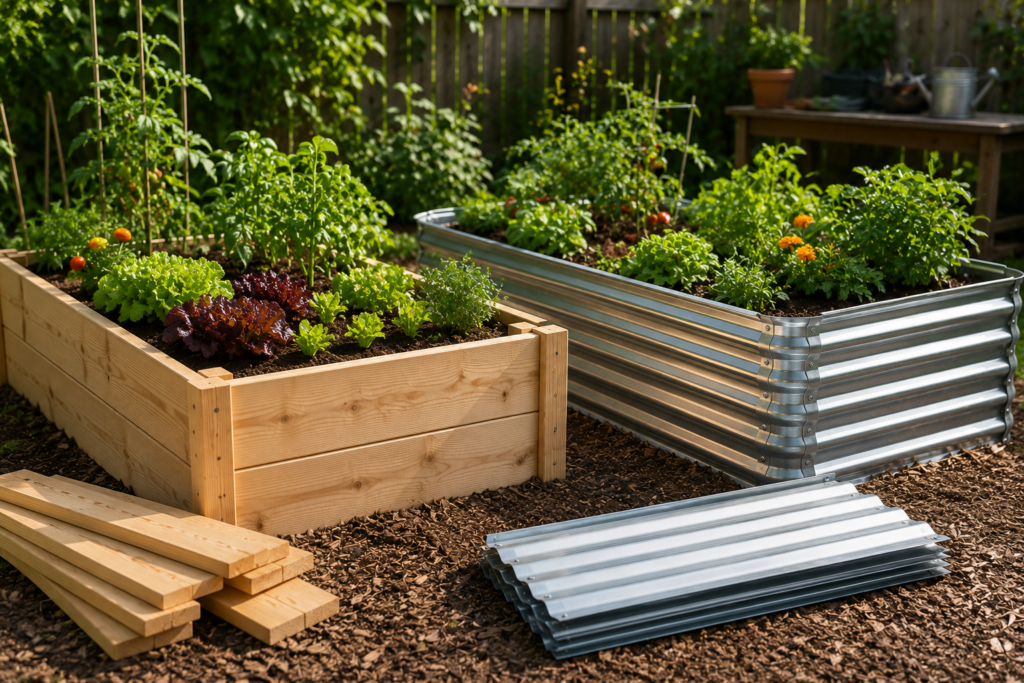
Wood vs. Metal Raised Beds
For a first raised bed, untreated wood is generally the easiest and most forgiving choice. It doesn’t require special tools, it’s simple to fix if you make a building mistake, and it holds up well for several seasons with only basic maintenance.
Galvanised metal is another option worth considering, especially if you plan to garden for many years. Metal beds last much longer and need very little upkeep, though they usually cost more upfront than a simple wooden frame.
| Material | Best for | Lifespan | Upfront Cost |
| Untreated wood | Beginners, first builds | Several seasons | Lower |
| Galvanized metal | Long-term gardeners | Many years | Higher |
If you’re building your first bed, wood is still the more forgiving starting point. Metal is worth the investment once you know raised-bed gardening is something you’ll stick with.
Materials to Avoid
One material to avoid is old pressure-treated lumber of unknown age or reclaimed wood that may have been painted or chemically treated at some point. Since you’re growing food, it’s not worth the risk of not knowing what the wood has been exposed to.
Budgeting for a DIY Raised Bed
Budget-wise, expect to spend somewhere in the range of $80–$200 for a simple DIY wooden raised bed, depending on size and local material prices. You can spend less by reusing materials you already have, or more if you choose premium wood or a ready-made kit. If you’re deciding where to spend your budget, put more of it toward good soil than toward the frame — soil quality will affect your harvest far more than the materials the bed is built from.
Picking the Right Raised Bed Size
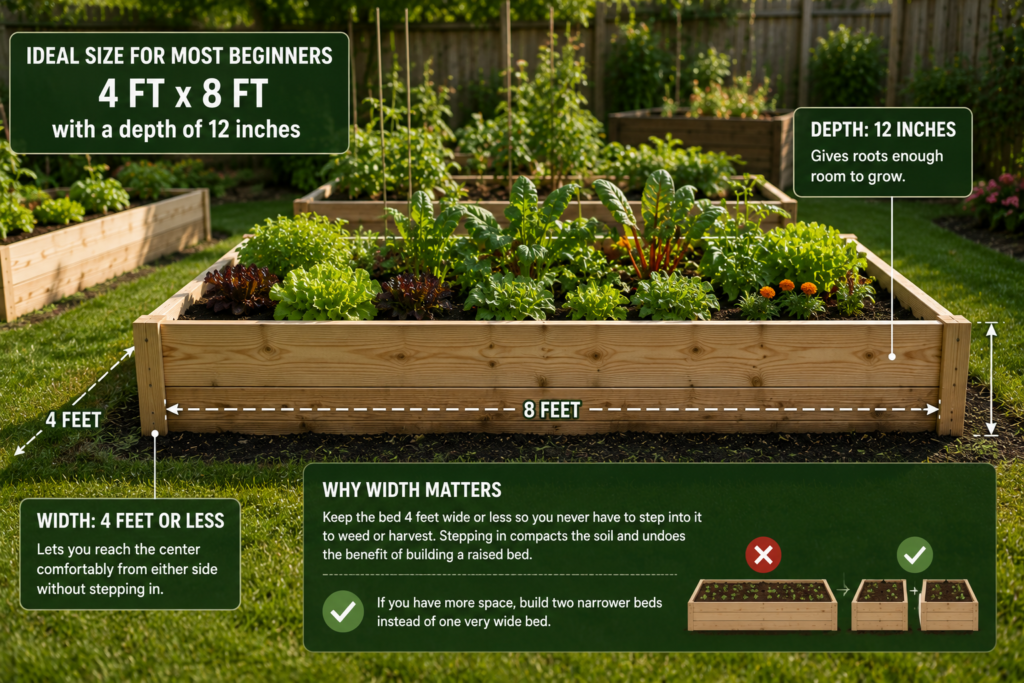
A size of roughly 4 feet by 8 feet, with a depth of around 12 inches, works well for most beginners. That depth gives roots enough room to grow, and that width lets you reach the centre of the bed comfortably from either side.
Width matters more than most beginners expect. Keep the bed to about 4 feet wide or less so you never have to step into it to weed or harvest. Stepping into the bed compacts the very soil you worked to loosen, which undoes a lot of the benefit of building a raised bed in the first place. If you have more space, it’s better to build two narrower beds than one very wide one.
How to Make a Raised Garden Bed: Step-by-Step
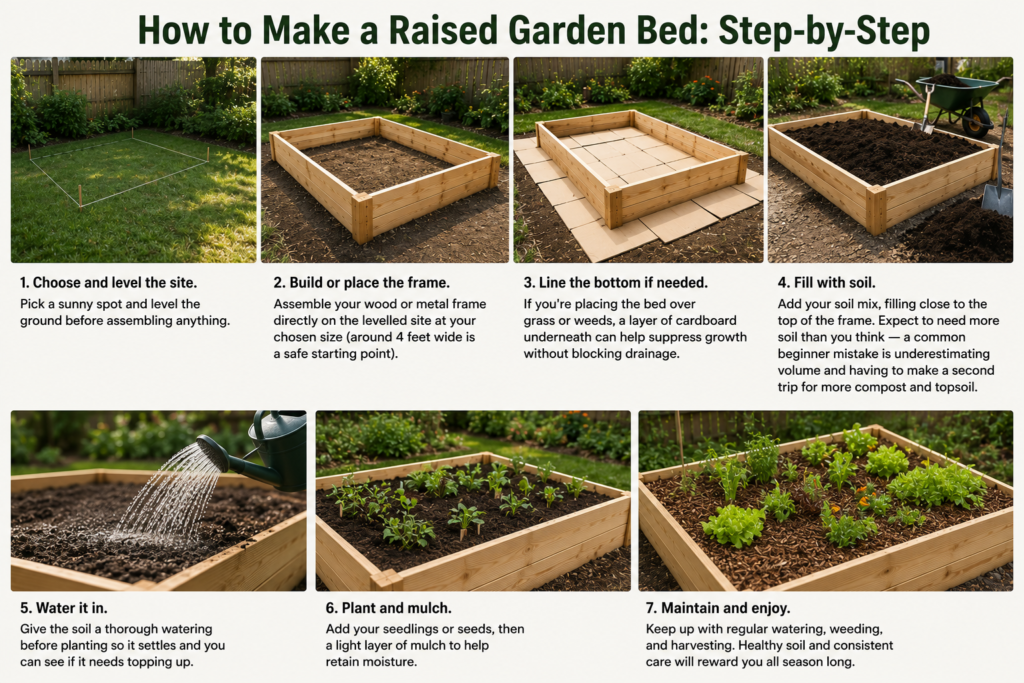
Plant and mulch. Add your seedlings or seeds, then a light layer of mulch to help retain moisture.
Choose and level the site. Pick a sunny spot and level the ground before assembling anything.
Build or place the frame. Assemble your wood or metal frame directly on the levelled site at your chosen size (around 4 feet wide is a safe starting point).
Line the bottom if needed. If you’re placing the bed over grass or weeds, a layer of cardboard underneath can help suppress growth without blocking drainage.
Fill with soil. Add your soil mix, filling close to the top of the frame. Expect to need more soil than you think. A common beginner mistake is underestimating volume and having to make a second trip for more compost and topsoil.
Water it in. Give the soil a thorough watering before planting so it settles and you can see if it needs topping up.
Getting the Soil Mix Right
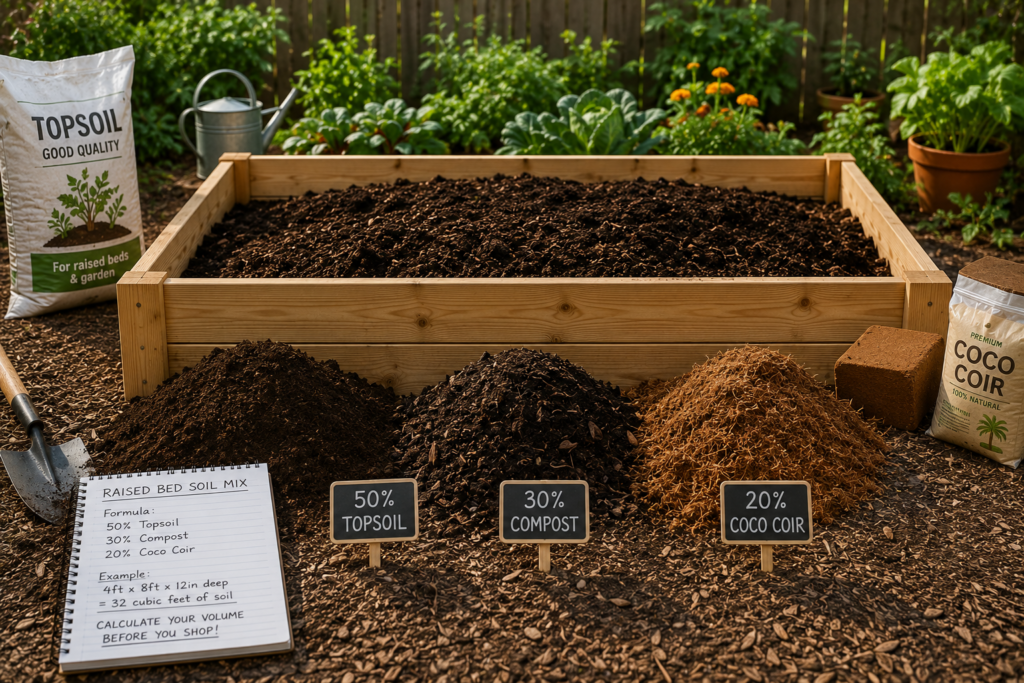
The soil is where most of the real difference happens, and it’s worth getting right. A reliable raised-bed soil mix is roughly 50% good-quality topsoil, 30% finished compost, and 20% coco coir. If the mix feels heavy, a little coarse sand or fine pine bark can improve drainage without overdoing it.
A mistake worth avoiding: filling most of the bed with garden soil and adding only a thin layer of compost on top. It looks fine at first, but within a few weeks that soil tends to compact, drainage becomes uneven, and plants grow noticeably less vigorously. The soil needs to be loose and rich in organic matter all the way through, not just on the surface.
Look for compost that’s well-finished — it should smell earthy and crumbly, not fresh or woody. The specific brand matters less than the quality; what matters is that it’s fully broken down. Each new season, top up the bed with an inch or two of fresh compost rather than replacing the soil entirely. That keeps the bed productive with very little extra work.
Tip: A 4×8-foot bed at 12 inches deep holds around 32 cubic feet of soil — more than most beginners expect. Calculate your volume before you shop so you’re not making a second trip.
What Grows Well in a Raised Bed
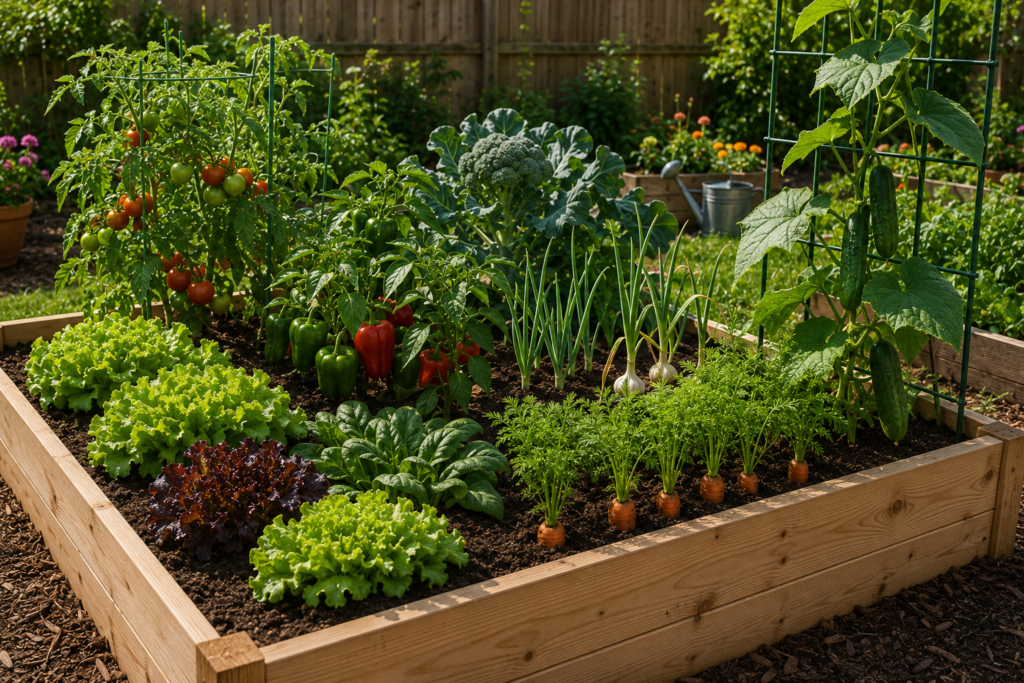
Some crops respond especially well to raised-bed growing. Tomatoes tend to be one of the most reliable choices, thanks to the better drainage and more consistent soil. Peppers, onions, and garlic also do well, and root vegetables like carrots benefit noticeably from the loose soil structure.
Leafy greens such as lettuce and spinach thrive in raised beds too, particularly during cooler months when they’re not stressed by heat. Cucumbers are worth a mention as well — adding a simple trellis next to the bed keeps the vines off the ground, improves airflow, makes harvesting easier, and tends to reduce disease problems.
Timing still matters, even in a raised bed. Broccoli, for instance, needs to go in at the right point in the season — plant it too late, and a stretch of warm weather while the heads are forming can cause them to stay small or bolt early. A raised bed improves your growing conditions, but it doesn’t remove the need to plant at the right time.
Common Raised Garden Bed Mistakes to Avoid
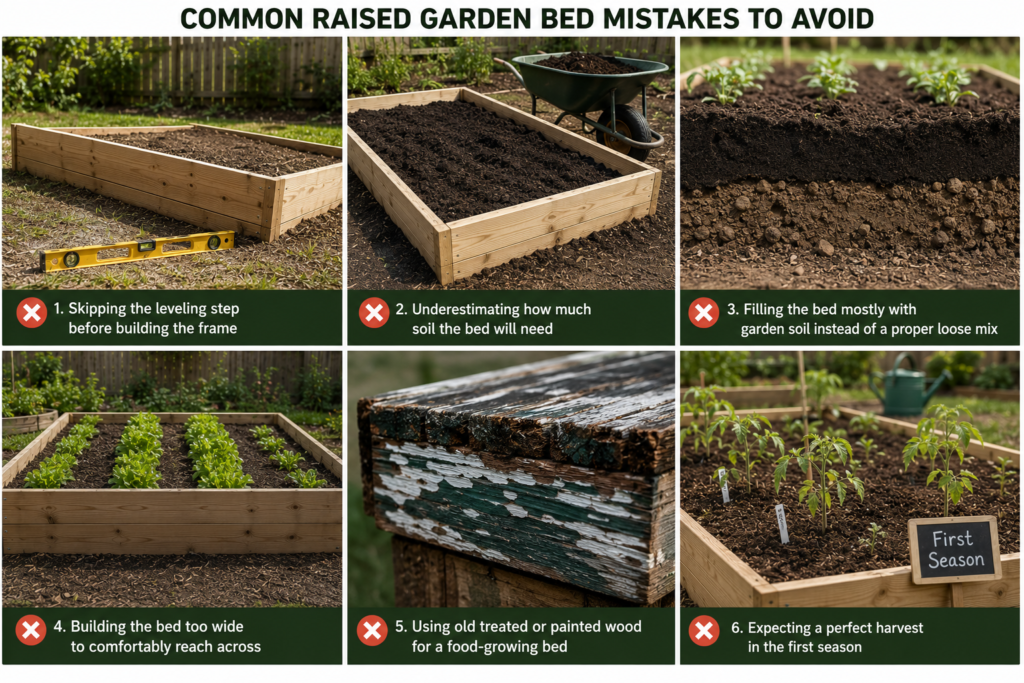
- Skipping the leveling step before building the frame
- Underestimating how much soil the bed will need
- Filling the bed mostly with garden soil instead of a proper loose mix
- Building the bed too wide to comfortably reach across
- Using old treated or painted wood for a food-growing bed
- Expecting a perfect harvest in the first season
That last point is worth sitting with. It’s completely normal to adjust your soil mix, move plants around, or find that some crops do better than others in your first year. A raised bed makes it easier to learn from those adjustments because you’re working with fewer uncontrolled variables than in-ground gardening.
Frequently Asked Questions
How deep should a raised garden bed be? Around 12 inches is a good starting depth for most vegetables, giving roots enough room while keeping the amount of soil needed manageable.
How wide should a raised garden bed be? Keep it to about 4 feet or less so you can reach the middle from either side without stepping into the soil.
What is the best soil mix for a raised garden bed? A dependable mix is roughly 50% topsoil, 30% finished compost, and 20% coco coir, with a little coarse sand or pine bark added if drainage needs improving.
How much soil do I need for a raised garden bed? Multiply length x width x depth in feet to get cubic feet, then convert to your supplier’s units. A 4×8-foot bed at 12 inches deep needs about 32 cubic feet. Plan to buy slightly more than the number suggests.
What’s the cheapest way to make a raised garden bed? Untreated wood is generally the most budget-friendly option, with a simple DIY bed typically costing between $80 and $200 depending on size and materials.
Can I use treated wood for a raised garden bed? It’s best to avoid old pressure-treated or painted wood of unknown history, since you can’t be sure what it’s been exposed to and you’re growing food in it.
Do I need to replace the soil in a raised bed every year? No. Topping up with an inch or two of fresh compost each season is usually enough to keep the soil healthy and productive.
What vegetables grow best in a raised garden bed? Tomatoes, peppers, onions, garlic, carrots, lettuce, spinach, and cucumbers (especially with a trellis) tend to do particularly well.
How do I stop water from pooling in my raised bed? Level the ground before you build the frame. An unlevel base is the most common cause of water collecting in one corner after watering or rain.
Final Thoughts
Learning how to make a raised garden bed isn’t complicated, but a handful of small details make the difference between a bed that struggles and one that performs well season after season. Levelling the ground first, filling it with a proper soil mix from top to bottom, and keeping the width manageable will save you the same headaches I ran into with my first build.
Don’t expect everything to be perfect in your first season; adjusting your soil, your plant choices, and your timing is part of the process. What a raised bed gives you is a much better starting point and far more control than in-ground gardening, and that alone makes it worth building.
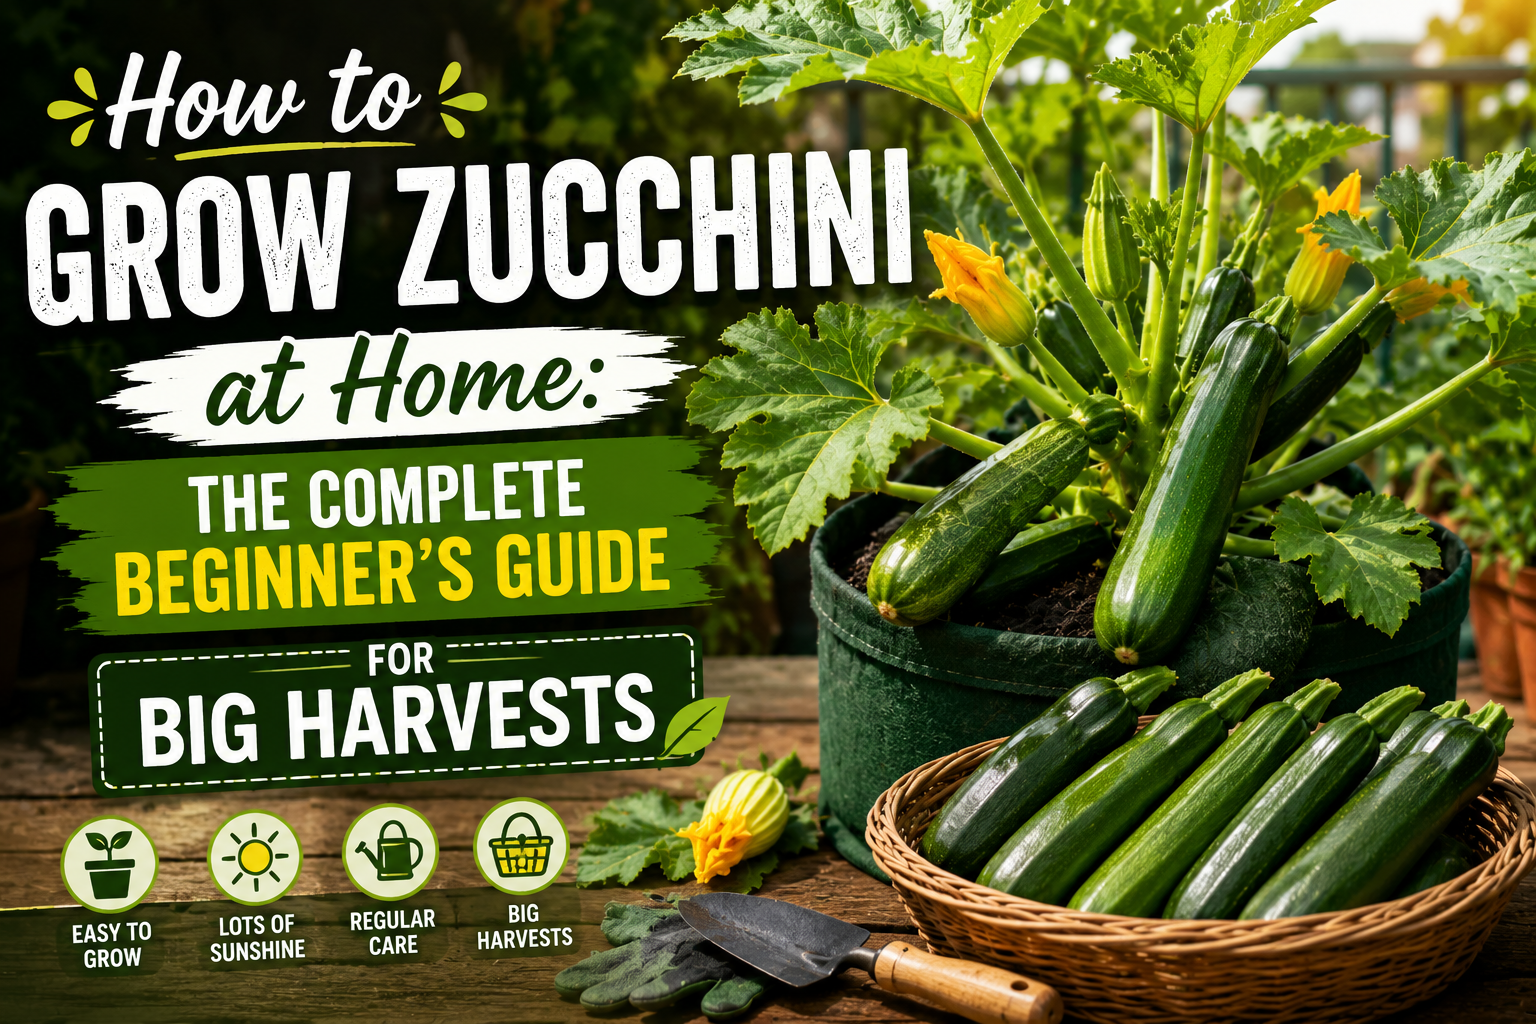
Growing zucchini at home is one of the most rewarding experiences in kitchen gardening. This fast-growing vegetable can produce a steady supply of fresh harvests for weeks when given the right care. Whether you have a backyard garden, raised beds, or just a large container on a rooftop or balcony, zucchini can be surprisingly productive.
I still remember the first time I successfully harvested a zucchini from my own garden. After weeks of watering, watching giant leaves spread across the container, and learning how to hand-pollinate flowers, finally picking that first zucchini felt like discovering hidden treasure. It was fresh, chemical-free, and far more flavourful than anything I had bought from a store.
In this guide, I’ll share everything I’ve learned from growing zucchini myself, including mistakes, solutions, and practical tips that can help beginners achieve bigger harvests.
Why Grow Zucchini at Home?
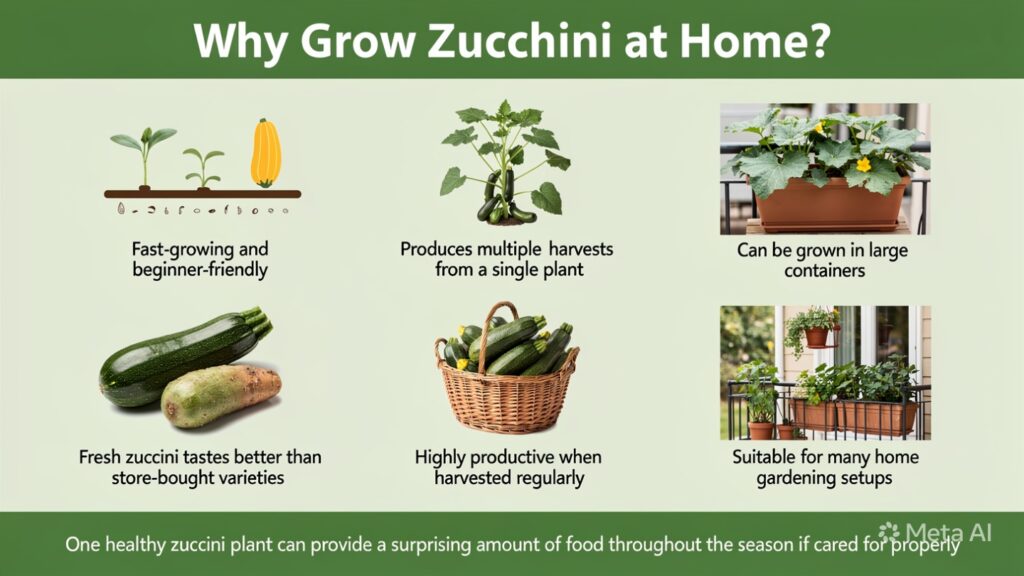
There are several reasons why zucchini deserves a place in every kitchen garden:
- Fast-growing and beginner-friendly
- Produces multiple harvests from a single plant
- Can be grown in large containers
- Fresh zucchini tastes better than store-bought varieties
- Highly productive when harvested regularly
- Suitable for many home gardening setups
One healthy zucchini plant can provide a surprising amount of food throughout the season if cared for properly.
Understanding How Zucchini Grows
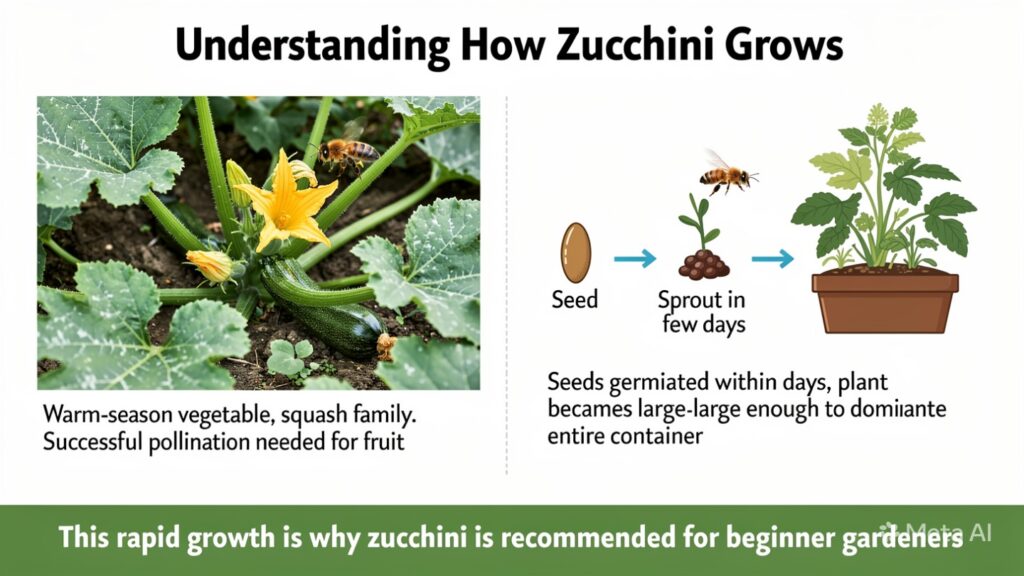
Before learning how to grow zucchini, it helps to understand its growth habit.
Zucchini is a warm-season vegetable that belongs to the squash family. The plant develops large leaves, strong stems, and separate male and female flowers. Successful pollination is necessary for fruit production.
One thing that surprised me during my first growing attempt was how quickly zucchini grows. The seeds germinated within a few days, and soon the plant became large enough to dominate the entire container.
This rapid growth is one reason zucchini is often recommended for beginner gardeners.
Best Time to Grow Zucchini
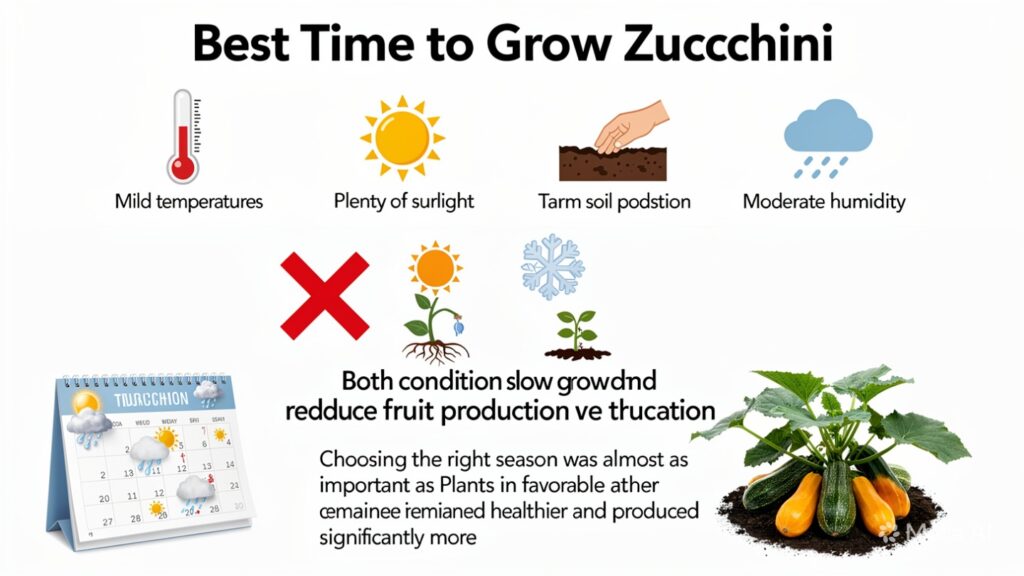
Timing plays a huge role in zucchini success.
Zucchini prefers:
- Mild temperatures
- Plenty of sunlight
- Warm soil
- Moderate humidity
Avoid planting during periods of extreme heat or severe cold because both conditions can slow growth and reduce fruit production.
In my experience, choosing the right season was almost as important as pollination. Plants grown during favourable weather remained healthier and produced significantly more zucchini.
Choosing the Right Container
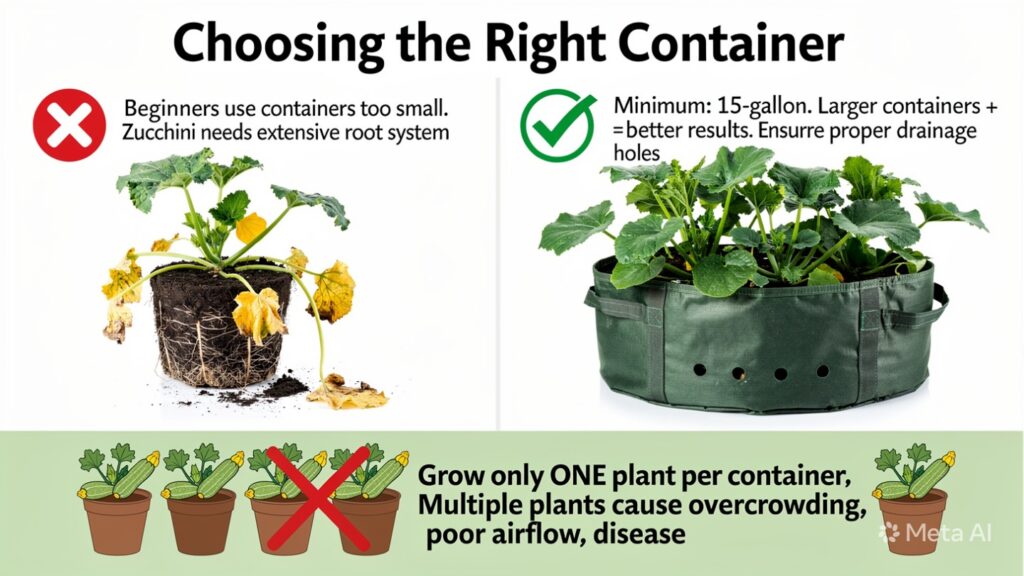
One of the biggest mistakes beginners make is using containers that are too small.
Zucchini develops an extensive root system and requires plenty of space.
Recommended Container Size
- Minimum: 15-gallon container or grow bag
- Larger containers produce better results
- Ensure proper drainage holes
I always recommend growing only one zucchini plant per container. Trying to fit multiple plants into the same container usually leads to overcrowding, poor airflow, and increased disease problems.
The Best Soil Mix for Zucchini
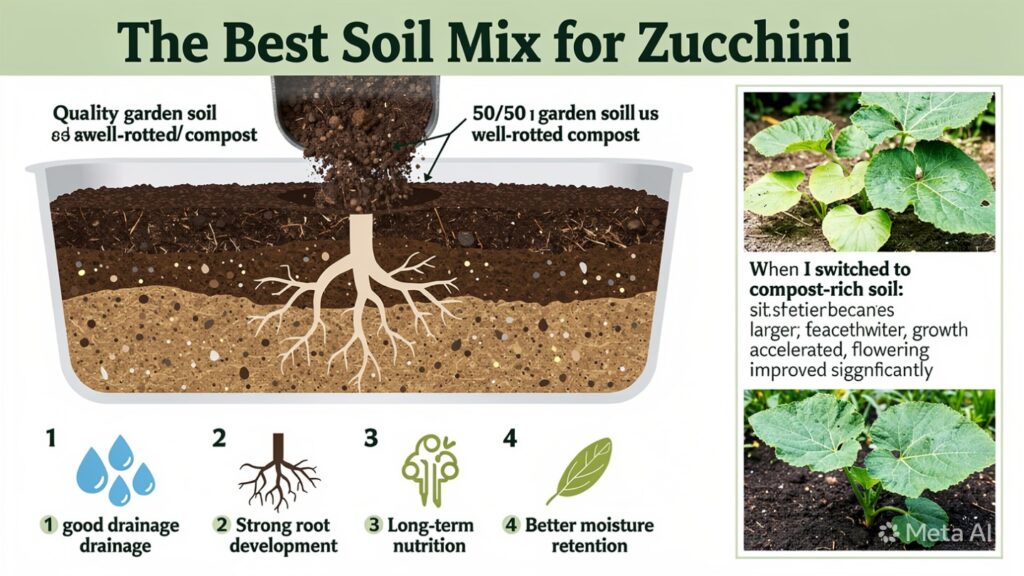
Zucchini is a heavy feeder, meaning it requires nutrient-rich soil to produce healthy growth and continuous harvests.
Ideal Soil Mix
- 50% quality garden soil
- 50% well-rotted compost or organic matter
This rich soil mixture provides the following:
- Good drainage
- Strong root development
- Long-term nutrition
- Better moisture retention
When I switched to a compost-rich soil mix, the difference in plant vigour was noticeable. The leaves became larger, growth accelerated, and flowering improved significantly.
How to Plant Zucchini Seeds
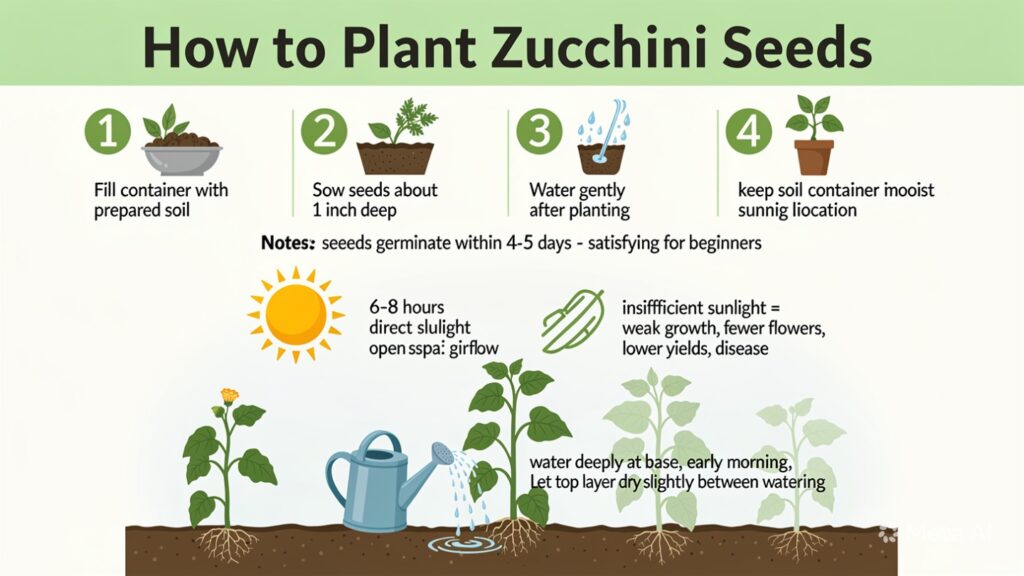
Growing zucchini from seed is simple and affordable.
Step-by-Step Planting
- Fill your container with prepared soil.
- Sow seeds about 1 inch deep.
- Water gently after planting.
- Place the container in a sunny location.
- Keep the soil slightly moist until germination.
Under suitable conditions, zucchini seeds often germinate within 4 to 5 days.
This quick germination makes zucchini especially satisfying for beginner gardeners.
Sunlight Requirements
Zucchini loves sunlight.
For best growth, provide:
- 6–8 hours of direct sunlight daily
- Open space with good airflow
- Protection from excessive shade
Insufficient sunlight can lead to:
- Weak growth
- Fewer flowers
- Lower yields
- Increased disease pressure
The healthier the foliage, the greater the plant’s ability to produce fruit.
Watering Zucchini Correctly
Watering is where many beginners accidentally create problems.
The Right Way to Water
- Water deeply at the base of the plant
- Water early in the morning
- Allow the top layer of soil to dry slightly between waterings
Avoid These Mistakes
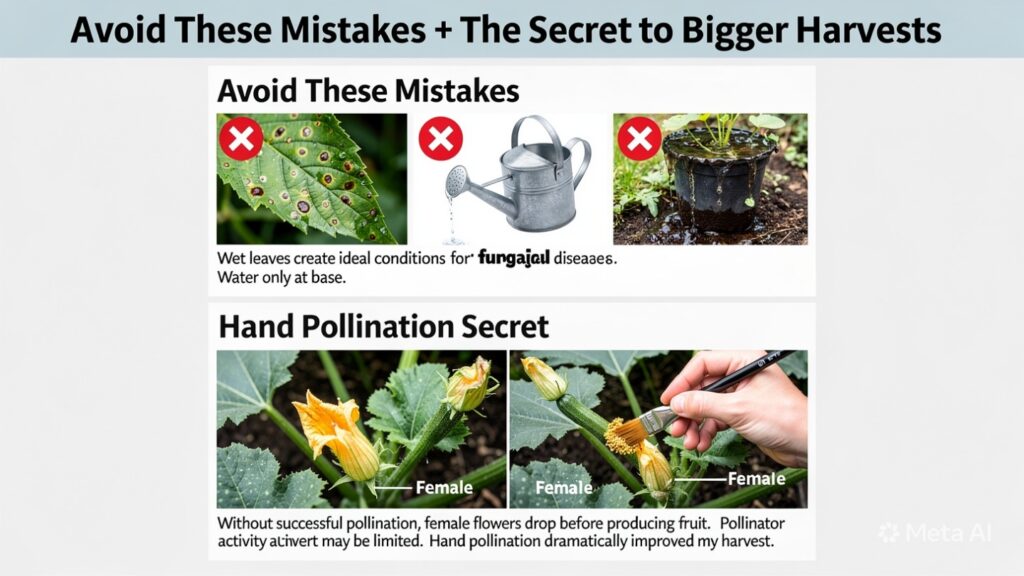
- Watering leaves directly
- Frequent shallow watering
- Keeping soil constantly soaked
One lesson I learned the hard way is that wet leaves create ideal conditions for fungal diseases. Once I switched to watering only at the base, plant health improved noticeably.
The Secret to Bigger Harvests: Hand Pollination
If there is one technique that dramatically improved my zucchini harvest, it was hand pollination.
Why Pollination Matters
Zucchini produces:
- Male flowers
- Female flowers
Without successful pollination, female flowers often drop before producing fruit.
Many gardeners assume pollination will happen naturally. However, in some growing environments, pollinator activity may be limited.
How to Hand Pollinate Zucchini
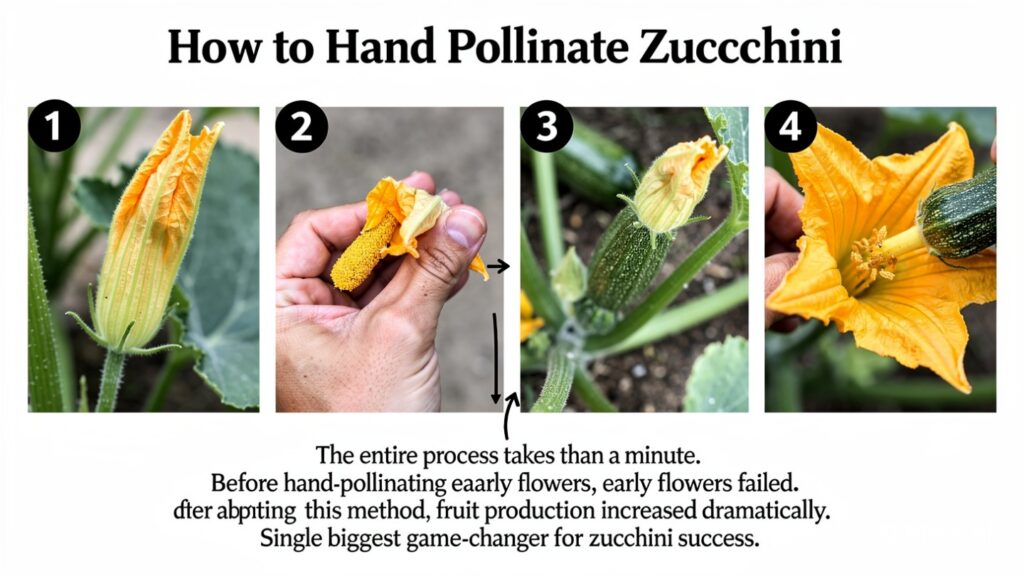
- Identify a male flower.
- Remove the petals.
- Locate a female flower (it has a tiny zucchini behind it).
- Gently touch the pollen-covered male flower to the centre of the female flower.
The entire process takes less than a minute.
In my garden, several early flowers failed before I started hand-pollinating. After adopting this simple method, fruit production increased dramatically.
For me, hand pollination was the single biggest game-changer for zucchini success.
Common Beginner Mistakes
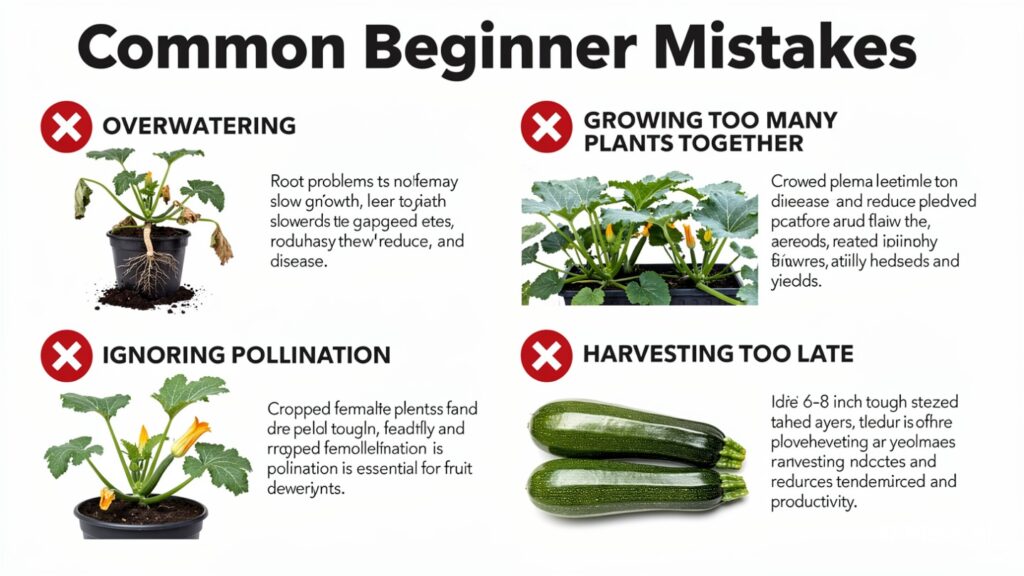
1. Overwatering
Too much water causes the following:
- Root problems
- Slow growth
- Disease outbreaks
Always check soil moisture before watering.
2. Growing Too Many Plants Together
Zucchini requires space.
Crowded plants experience:
- Poor airflow
- Higher disease pressure
- Reduced yields
3. Ignoring Pollination
Healthy plants can still fail to produce zucchini if flowers are not properly pollinated.
4. Harvesting Too Late
Large zucchini may look impressive, but they become less tender as they mature.
Regular harvesting encourages continuous production.
How to Prevent Powdery Mildew
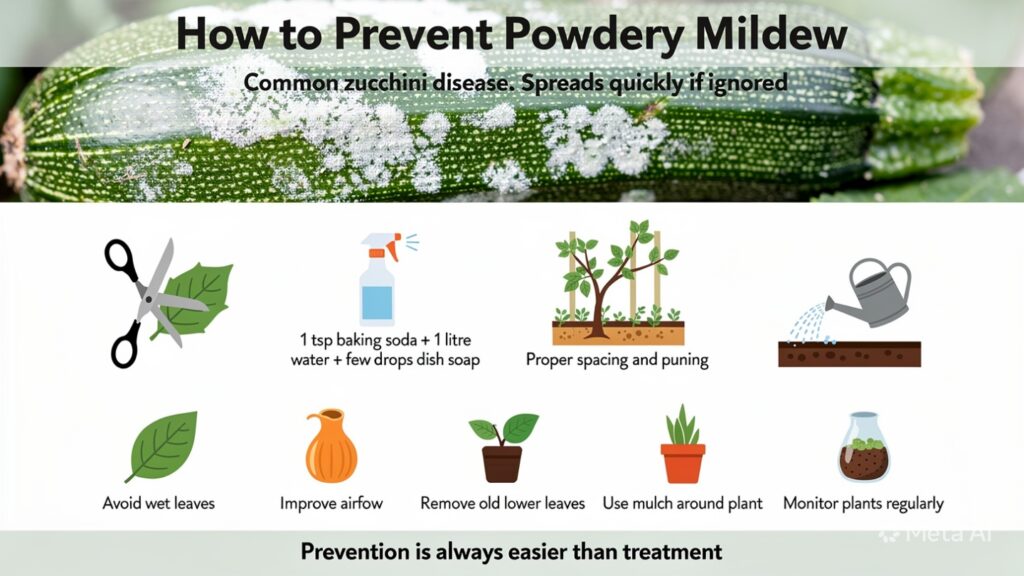
Powdery mildew is one of the most common zucchini diseases.
It appears as a white powder-like coating on leaves and can quickly spread if ignored.
I experienced this issue during one of my growing seasons, and it taught me the importance of prevention.
What Worked for Me
Remove Infected Leaves
I immediately removed heavily infected leaves to improve airflow and reduce disease spread.
Use a Baking Soda Spray
A simple homemade spray helped slow fungal growth:
- 1 teaspoon baking soda
- 1 litre of water
- A few drops of dish soap
Apply weekly as needed.
Improve Air Circulation
Proper spacing and selective pruning helped leaves dry faster after watering.
Water Only at the Base
Keeping foliage dry became one of my most effective disease-prevention strategies.
Prevention Tips
- Avoid wet leaves
- Improve airflow
- Remove old lower leaves
- Use mulch around the plant
- Monitor plants regularly
Remember: prevention is always easier than treatment.
Harvesting Zucchini
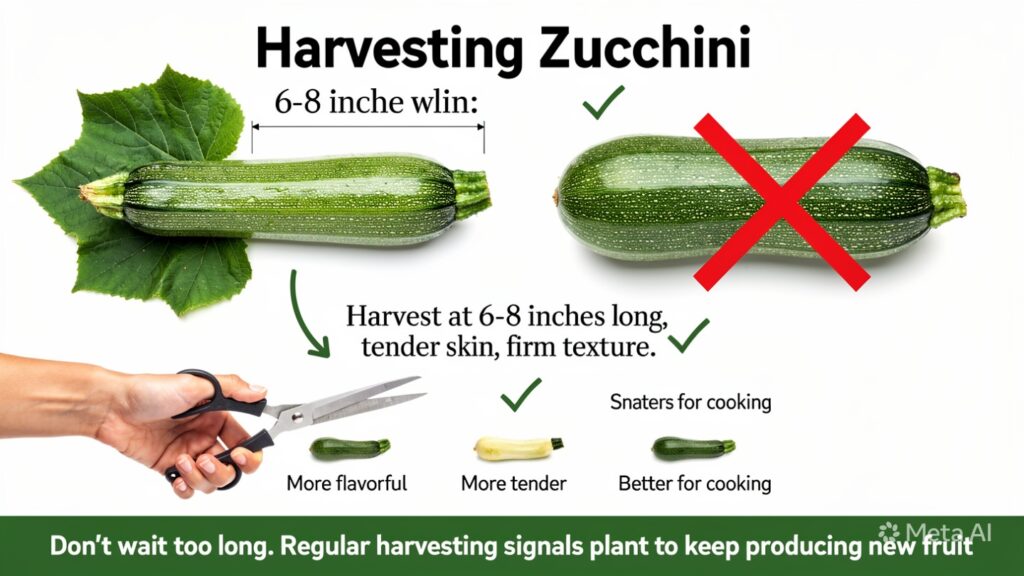
One of the most exciting parts of growing zucchini is how quickly the fruits mature.
When to Harvest
Harvest zucchini when they reach the following size:
- 6–8 inches long
- Tender skin
- Firm texture
Don’t wait too long.
Smaller zucchini are usually the following:
- More flavorful
- More tender
- Better for cooking
Regular harvesting signals the plant to keep producing new fruit.
My Results Growing Zucchini:
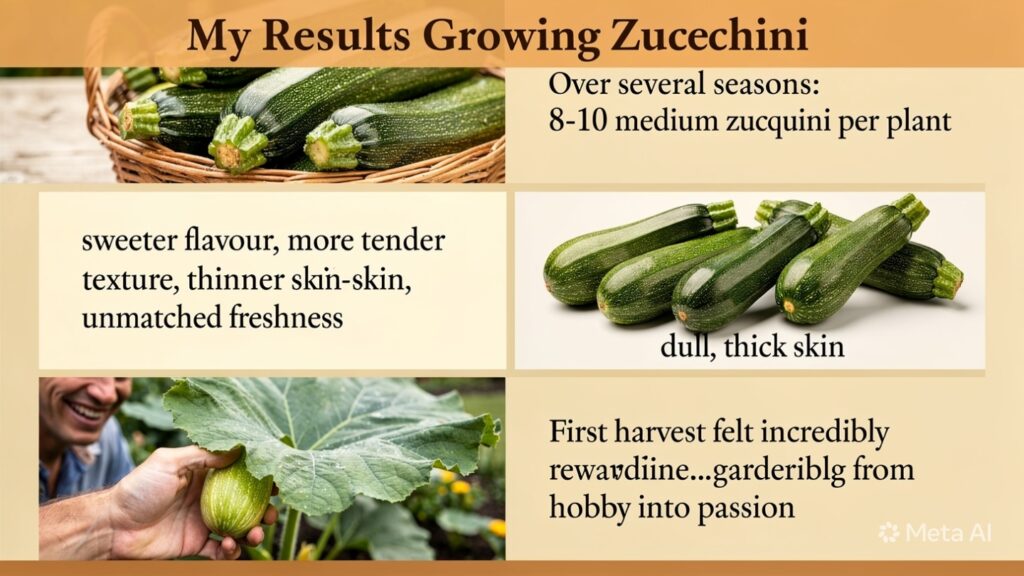
Over several growing seasons, I experimented with different zucchini plants and growing methods.
My most successful plants produced approximately 8–10 medium-sized zucchini during a season.
What impressed me most was the quality.
Compared to store-bought zucchini:
- The flavour was noticeably sweeter
- The texture was more tender
- Skin was thinner
- Freshness was unmatched
The first time I harvested a zucchini from my own garden, it felt incredibly rewarding. After weeks of care, seeing a healthy fruit hidden beneath those giant leaves was proof that the effort had paid off.
That experience transformed gardening from a hobby into a passion.
Beginner Success Blueprint
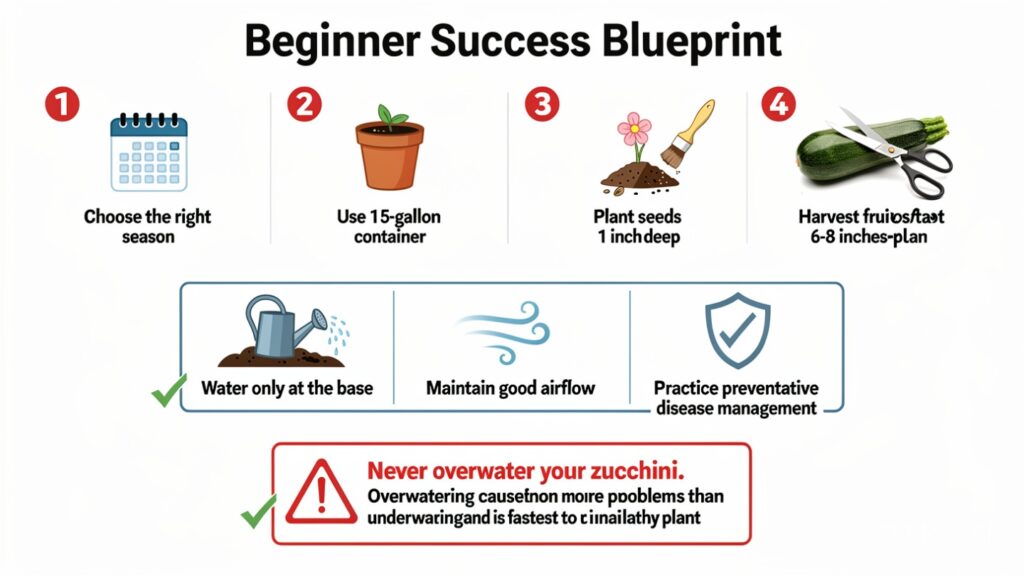
If you’re growing zucchini for the first time, follow this simple plan:
- Choose the right season.
- Use a 15-gallon container.
- Prepare rich compost-based soil.
- Plant seeds 1 inch deep.
- Hand-pollinate flowers if needed.
- Harvest fruits at 6–8 inches.
Three Non-Negotiable Rules
- Water only at the base.
- Maintain good airflow.
- Practice preventative disease management.
One Thing to Avoid
Never overwater your zucchini.
Overwatering causes more problems than underwatering and is one of the fastest ways to ruin an otherwise healthy plant.
Frequently Asked Questions (FAQs)
How long does zucchini take to grow from seed?
Zucchini seeds usually germinate within 4–5 days, and most plants begin producing harvestable fruit within 45–60 days, depending on growing conditions.
Can zucchini grow in containers?
Yes. Zucchini grows very well in containers as long as the container is large enough. A 15-gallon grow bag or pot is recommended.
How many zucchini can one plant produce?
A healthy plant can produce around 8–10 or more zucchini during a growing season when harvested regularly.
Why are my zucchini flowers falling off?
This usually happens because of poor pollination. Hand pollination can significantly improve fruit production.
How often should I water zucchini?
Water deeply when the top layer of soil begins to dry. Avoid keeping the soil constantly wet.
Final Thoughts
Learning how to grow zucchini at home is easier than many beginners expect. The plant grows quickly, produces generously, and rewards even small amounts of effort with fresh harvests.
The biggest lessons I learned were simple: give the plant enough space, keep the leaves dry, and never underestimate the power of hand pollination. Those three practices alone can dramatically improve your results.
If you stay consistent with watering, monitor the plant regularly, and harvest on time, a single zucchini plant can provide weeks of delicious homegrown vegetables and one of the most satisfying experiences in kitchen gardening.
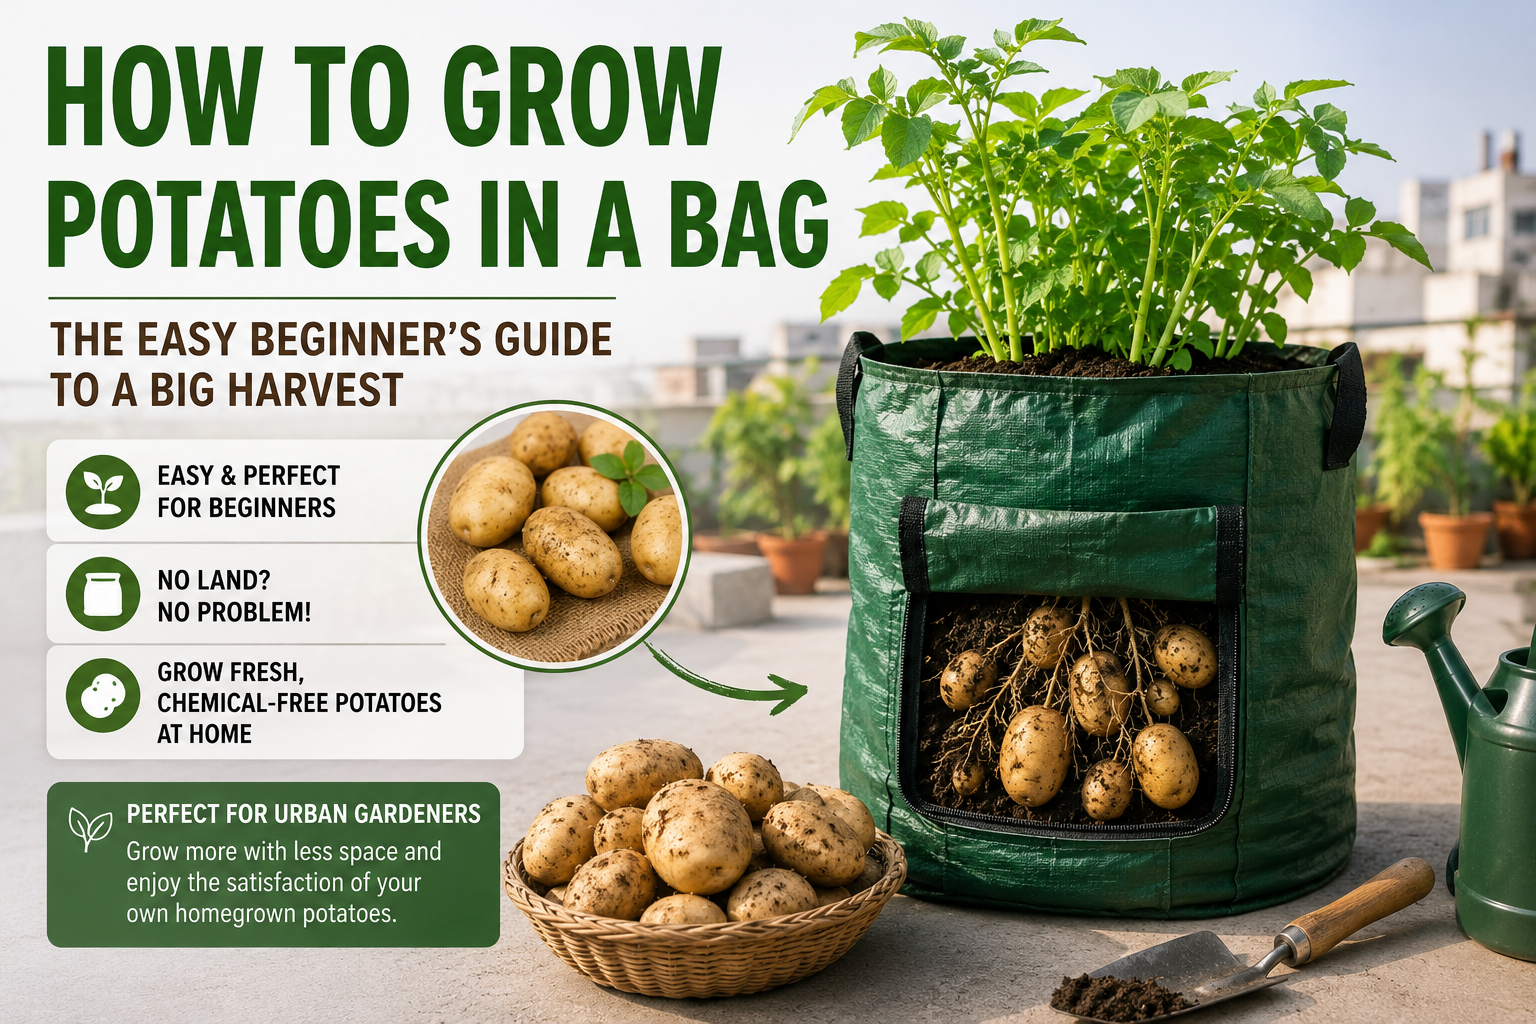
Introduction: Why Grow Potatoes in a Bag?
How to grow potatoes in a bag is one of the easiest and most rewarding methods for people who don’t have land but still want to experience kitchen gardening. Especially in urban areas like Karachi, where space is limited, this method gives beginners a chance to grow fresh, chemical-free potatoes at home.
My own journey with how to grow potatoes in a bag started on my rooftop. I never imagined that a simple bag, some soil, and a few seed potatoes could completely change my understanding of food, patience, and gardening. Today, I can confidently say that this method is not just gardening; it is a learning experience.
My Personal Experience with How to Grow Potatoes in a Bag
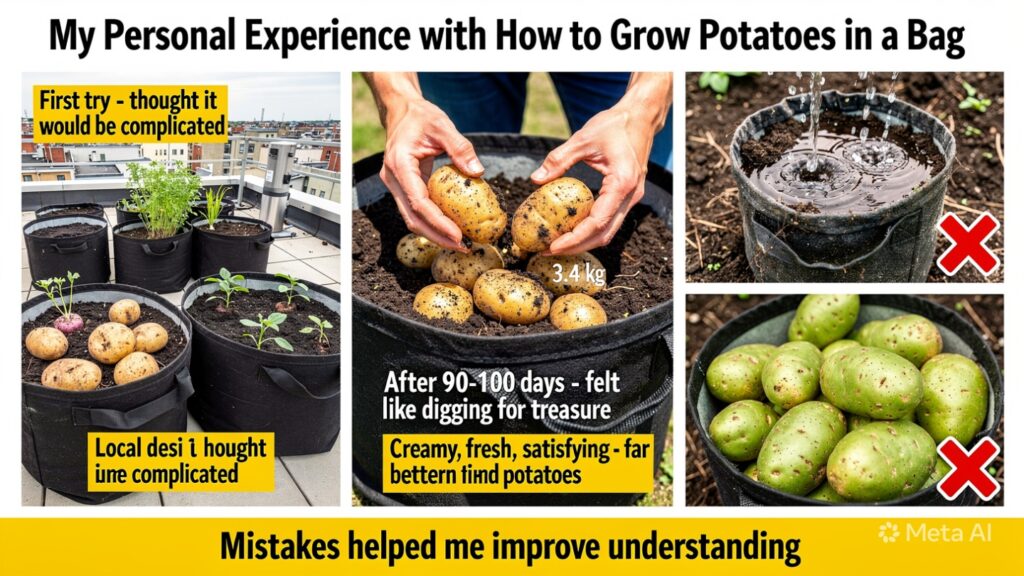
When I first tried growing potatoes in a bag, I honestly thought it would be complicated. But it turned out to be surprisingly simple and enjoyable.
I grew potatoes on my rooftop using black fabric grow bags (15-20 gallon size). I used local “desi potatoes” from the market as seed potatoes. I allowed them to sprout before planting and used 3/4 potatoes per bag.
The most exciting moment came after almost 90 to 100 days, when I harvested everything. It felt like digging for treasure. From one bag, I got around 3.4 kg of fresh potatoes. The taste was far better than market potatoes – more creamy, fresh, and satisfying.
However, I also faced mistakes like overwatering and green potatoes due to sun exposure. But those mistakes helped me improve my understanding of how to grow potatoes in a bag properly.
Step-by-Step Guide: How to Grow Potatoes in a Bag
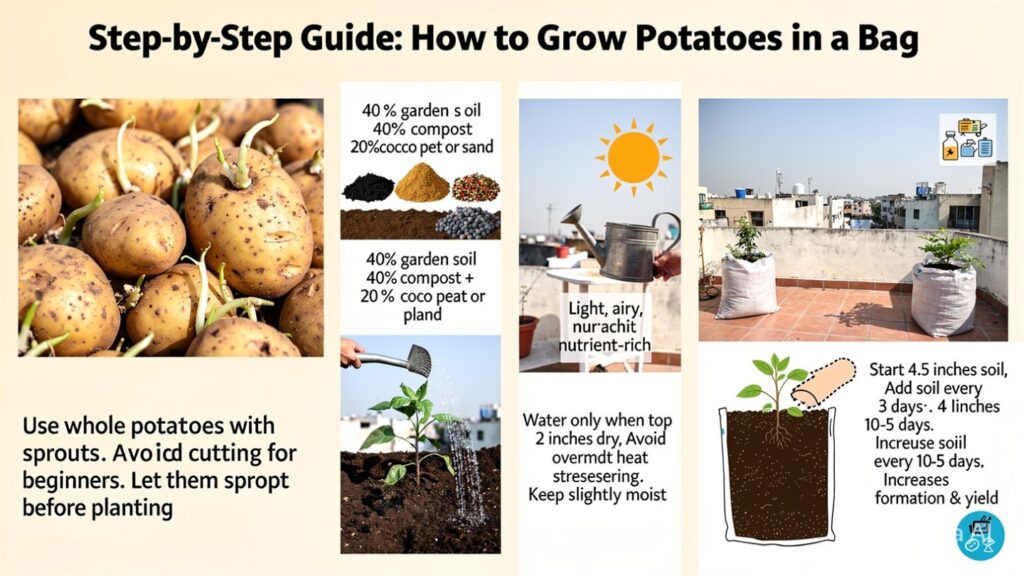
1. Choosing Seed Potatoes
For how to grow potatoes in a bag, you don’t need fancy varieties. Local desi potatoes work perfectly.
- Use whole potatoes with sprouts
- Avoid cutting for beginners (reduces rot risk)
- Let them sprout before planting
2. Best Soil Mix for Bags
Soil quality is the foundation of how to grow potatoes in a bag successfully.
My personal mix:
- 40% garden soil
- 40% compost (old cow manure or organic compost)
- 20% coco peat or sand
This mix keeps the soil light, airy, and nutrient-rich, which is perfect for potato growth.
3. Sunlight Requirements
Potatoes need proper sunlight for the best results.
- 6 to 8 hours of direct sunlight daily
- In Karachi, rooftop conditions and morning sun are ideal
- Too much heat can stress plants, so some protection helps
4. Watering Method
Watering is a very important part of growing potatoes in a bag.
- Water only when the top 2 inches of soil feel dry
- Avoid overwatering (prevents rot)
- Keep soil slightly moist, not wet
- In hot weather, light evening watering helps
5. Earthing Up Technique (Most Important Step)
This is the secret behind a successful potato harvest.
- Start with only 4.5 inches of soil
- As the plant grows, keep adding soil every 10-15 days
- Cover stems properly
- This increases potato formation and yield
Challenges I Faced While Growing Potatoes in Bags
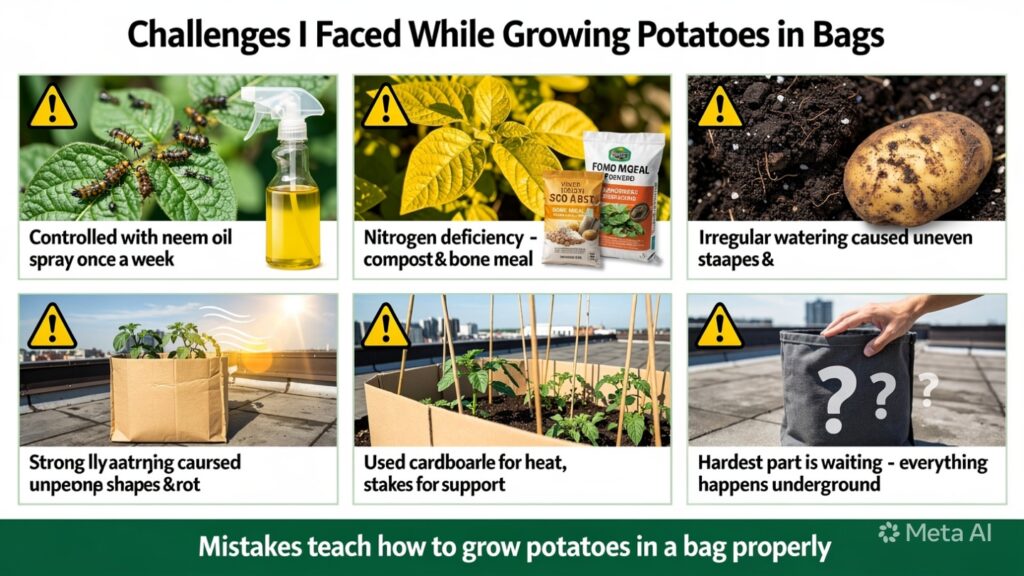
Learning how to grow potatoes in a bag is not without challenges.
Pest Problems
Aphids and small insects attacked my plants. I controlled them using neem oil spray once a week.
Yellowing Leaves
Some plants turned yellow due to nitrogen deficiency. Adding compost and bone meal fixed the issue.
Overwatering Mistakes
In the beginning, I watered irregularly. Sometimes too much, sometimes too little. This caused uneven potato shapes and occasional rot.
Weather Issues
Strong heat and wind were major problems. I used cardboard around bags to reduce heat and stakes to support plants.
Biggest Challenge: Patience
The hardest part of growing potatoes in a bag is waiting. Since everything is underground, you constantly wonder what is happening inside.
My Success Formula for How to Grow Potatoes in a Bag
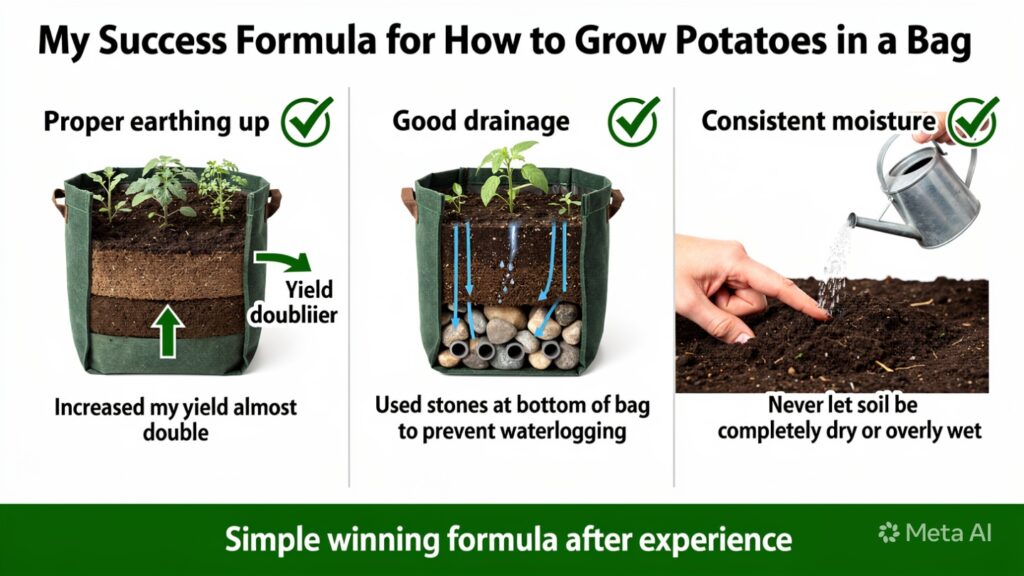
After experience, I developed a simple winning formula:
1. Proper Earthing Up
This increased my yield almost double.
2. Good Drainage
I used stones at the bottom of the bag to prevent waterlogging.
3. Consistent Moisture
Never let soil be completely dry or overly wet.
Fertiliser Strategy (Natural Feeding Method)
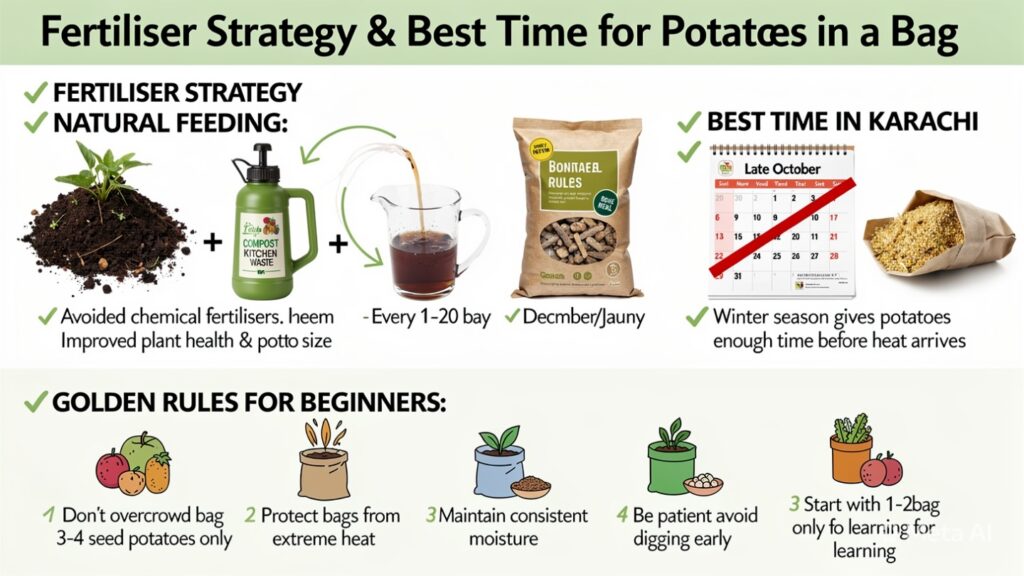
I avoided chemical fertilisers and used natural methods:
- Compost mixed in soil
- Compost tea made from kitchen waste every 15-20 days
- Bone meal for better tuber development
This improved both plant health and potato size.
Best Time for How to Grow Potatoes in a Bag in Karachi
Timing is very important.
- Best time: Late October to early November
- Avoid late planting in December or January
- The winter season gives potatoes enough time before the heat arrives
Golden Rules for Beginners
- Don’t overcrowd the bag (3–4 seed potatoes only)
- Protect bags from extreme heat
- Maintain consistent moisture
- Be patient and avoid digging early
- Start with 1-2 bags only for learning
Frequently Asked Questions (FAQs) - 1. How many potatoes can I grow in one bag?
- You can grow 3–4 seed potatoes per 15–20-gallon bag for best results.
- 2. How long does it take to grow potatoes in a bag?
- Usually 90 to 100 days, depending on weather and care.
- 3. Can I grow potatoes in a bag on a rooftop?
- Yes, rooftop gardening is one of the best methods for growing potatoes in bags.
- 4. What is the biggest mistake in growing potatoes in bags?
- Overwatering and overcrowding the bag are the most common mistakes.
- 5. Do potatoes need full sunlight?
- Yes, 6–8 hours of sunlight is ideal for healthy growth.
- 6. When should I harvest potatoes?
- When leaves turn yellow and dry, it means potatoes are ready for harvest.
Final Thoughts on How to Grow Potatoes in a Bag
How to grow potatoes in a bag is not just about farming; it is about mindset. It teaches patience, responsibility, and connection with food.
For me, it changed the way I look at meals. I stopped being just a consumer and became someone who understands the effort behind food production.
If you are a beginner, don’t wait for the perfect moment. Start small. Even if you fail, you will learn something valuable.
Gardening is not about perfection; it is about progress.
- How to Make a Raised Garden Bed: The Easy Beginner’s Guide
- How to Grow Zucchini at Home: The Complete Beginner’s Guide for Big Harvests
- How to Grow Potatoes in a Bag: The Easy Beginner’s Guide to a Big Harvest
- How to Grow Carrots at Home: The Complete Beginner’s Guide to Bigger Harvests
- How to Grow Okra Successfully at Home: The Complete Beginner’s Guide to Bigger Harvests
-
 Vegetable Gardening1 month ago
How to Grow Tomato Plants Successfully (Beginner’s Step-by-Step Guide)?
-
 Vegetable Gardening3 weeks ago
Why Your Chilli Pepper Plant Isn’t Producing Peppers (And How to Fix It)
-
 Vegetable Gardening1 month ago
How to Grow Pumpkins: The Complete Beginner’s Guide to a Huge Harvest
-
 Vegetable Gardening4 weeks ago
15 Best Veggies to Grow in Your Rooftop Garden for a Huge Harvest
-
 Vegetable Gardening3 weeks ago
Creative Outdoor Planter Ideas for Small Yards, Balconies, and Patios
-
 Beginner Guides4 weeks ago
Growing Vegetables at Home: A Beginner’s Guide That Actually Works
-
 Beginner Guides3 weeks ago
Grow Onions at Home: The Complete Beginner’s Guide to Bigger Harvests
-
 Beginner Guides2 weeks ago
🥒 How to Grow Cucumbers at Home Easily (Step-by-Step Beginner Guide)