Gardening Guides
How to Make a Fairy Garden: The Easy Beginner’s Guide (Step-by-Step)

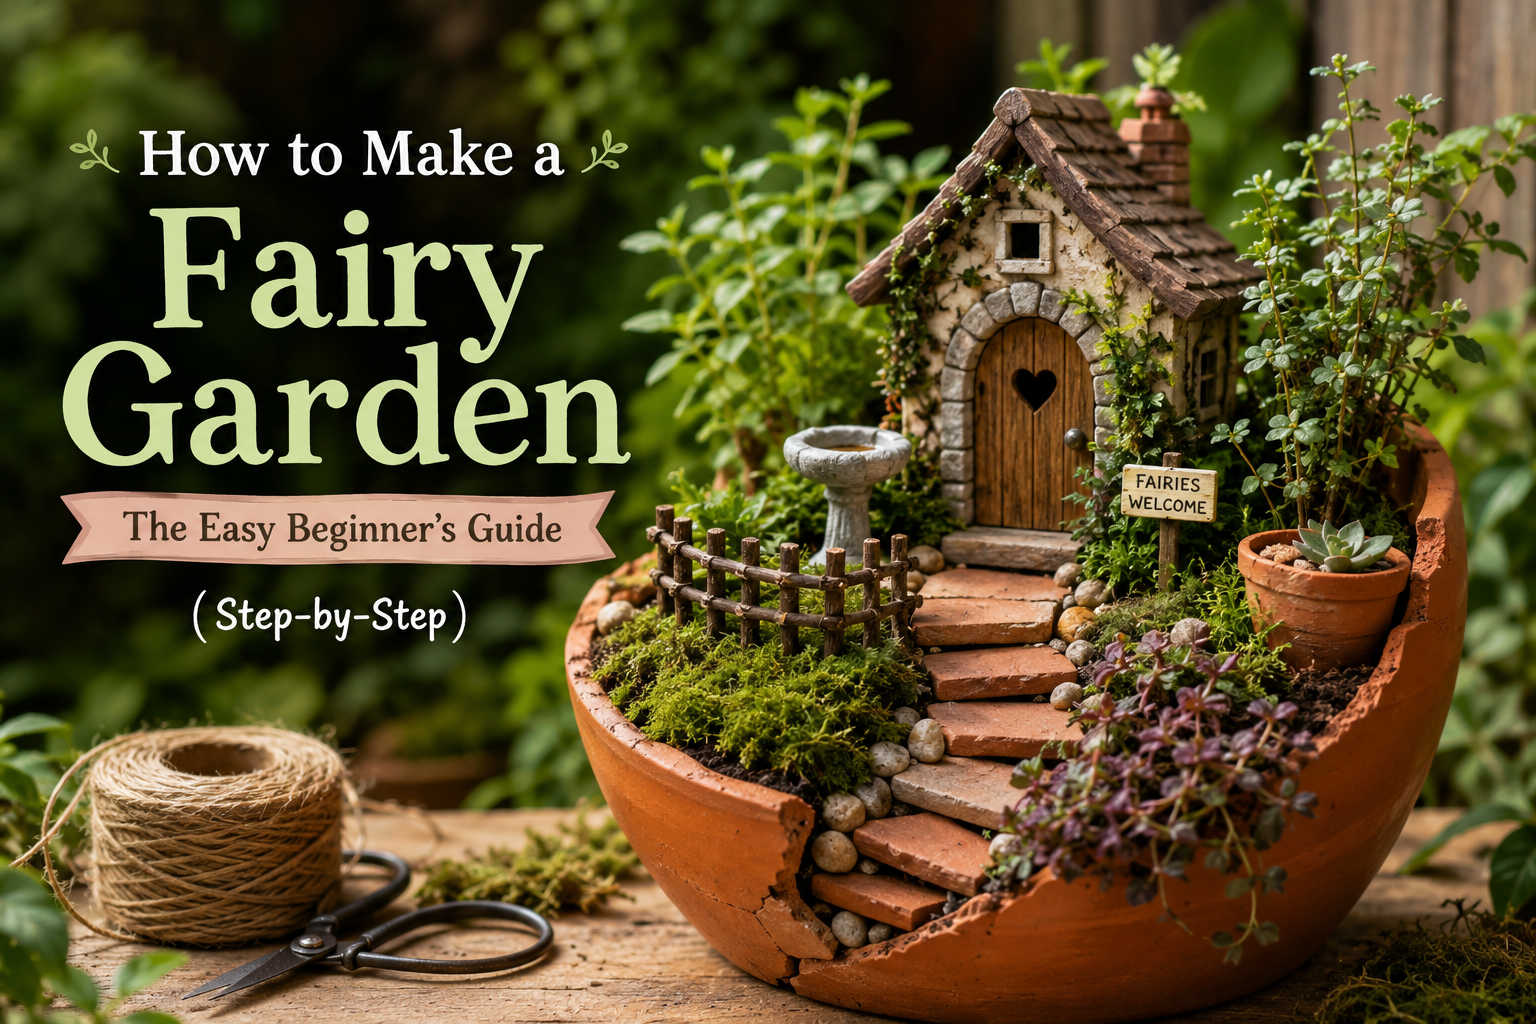
It started with a broken pot I didn’t have the heart to throw away.
One of my terracotta planters cracked along the side, and instead of tossing it, I turned the broken edge into a little set of steps leading up to a tiny house I’d tucked into the soil. I added a scrap of moss, a pinch of creeping thyme, and a twig fence I bent into shape in about ten minutes. It wasn’t fancy. But that little pot got more compliments than every vegetable container on my balcony combined.
That’s how I fell into fairy gardens, and three years later, I’m still making them, some as quick one-pot projects, others more detailed with stones, moss, and tiny houses. If you’ve ever wondered how to make a fairy garden without spending a fortune or needing a “kit”, this guide walks through exactly how I do it, including the mistakes that taught me the most. Fairy gardens are really just a whimsical corner of miniature gardening, and once you’ve finished one DIY miniature garden, it’s hard to stop at just one.
Quick Answer To make a fairy garden, pick a small container with drainage, choose a simple theme, and place your fairy house or biggest feature first. Add slow-growing plants like moss or creeping thyme, build a path with pebbles or bark, then finish with one or two natural or miniature accessories. No kit required.
What Is a Fairy Garden? (Quick Answer)
A fairy garden is a miniature landscape planted in a container, built around a small theme like a cottage, path, or tiny village. You combine slow-growing plants with natural materials – stones, twigs, bark and a few small decorations – to create a “tiny world” that fits on a balcony, patio, or windowsill.
How to Make a Fairy Garden Step by Step
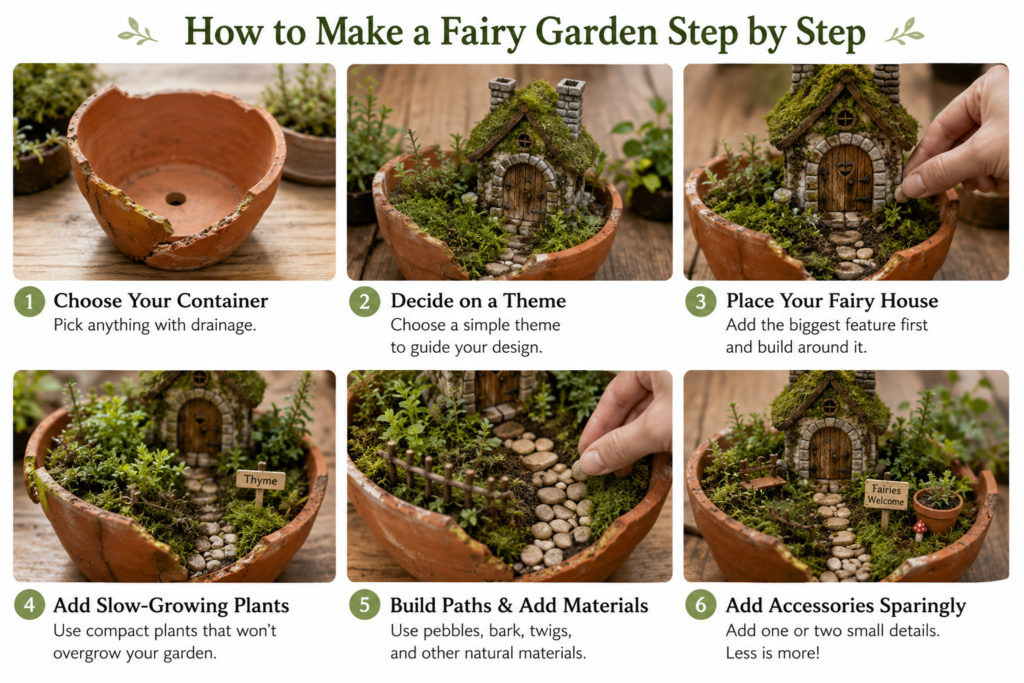
You don’t need a special fairy garden kit to get started. Here’s the process I actually use: container to finished project.
1. Choose Your Fairy Garden Container
Almost anything with (or that you can add) drainage works as a fairy-garden container or miniature planter. My personal favourite is still a broken or chipped terracotta pot, because you can turn the damaged section into little steps instead of hiding it. I’ve also had great results with shallow ceramic bowls, small wooden boxes, and even old metal buckets once I drilled a few drainage holes, though I learnt the hard way that a metal tin left in full sun can dry out moss in a single afternoon, so I always give those a shadier spot.
| Container Type | Best For | Watch Out For |
| Broken/chipped terracotta pot | Rustic, natural-looking designs; using “damage” as a feature | Can dry out faster than other materials |
| Shallow ceramic bowl | Indoor fairy gardens, tabletop displays | Needs drainage holes drilled if it doesn’t have any |
| Small wooden box | Outdoor gardens with a cottage or woodland theme | Untreated wood breaks down faster in wet climates. |
| Old metal bucket or tin | Budget-friendly, easy to find around the house | Can heat up quickly in direct sun |
2. Decide on a Simple Theme
Before I plant anything, I picture who “lives” in the garden. It might be a tiny woodland cottage, a quiet enchanted garden retreat, or a whole fairy village. You don’t need to overthink this step; the theme is just there to help you decide where the path, house, and plants go.
3. Place Your Fairy House First
I always add the biggest feature, usually a small fairy house, before anything else. Everything in the container gets built around it: the path leading up to the door, a bench nearby, and a fence along the edge.
4. Add Slow-Growing Fairy Garden Plants
This is the step that makes or breaks a fairy garden. Fast-growing plants might look lush in the first few weeks, but they’ll swallow your paths and houses within a month. Stick to compact, slow-growing varieties instead (more on exact plants below).
5. Build Paths and Add Natural Materials
Small pebbles make great paths, bits of bark work well as bridges, and twigs can be bent into fences. These materials are free if you already garden, and they tend to look more natural than store-bought miniatures.
6. Add a Few Miniature Accessories Sparingly
This is where most beginners go wrong. Add one or two small fairy garden accessories, not a dozen. A cluttered container stops looking magical and starts looking busy.
Best Plants for Fairy Gardens
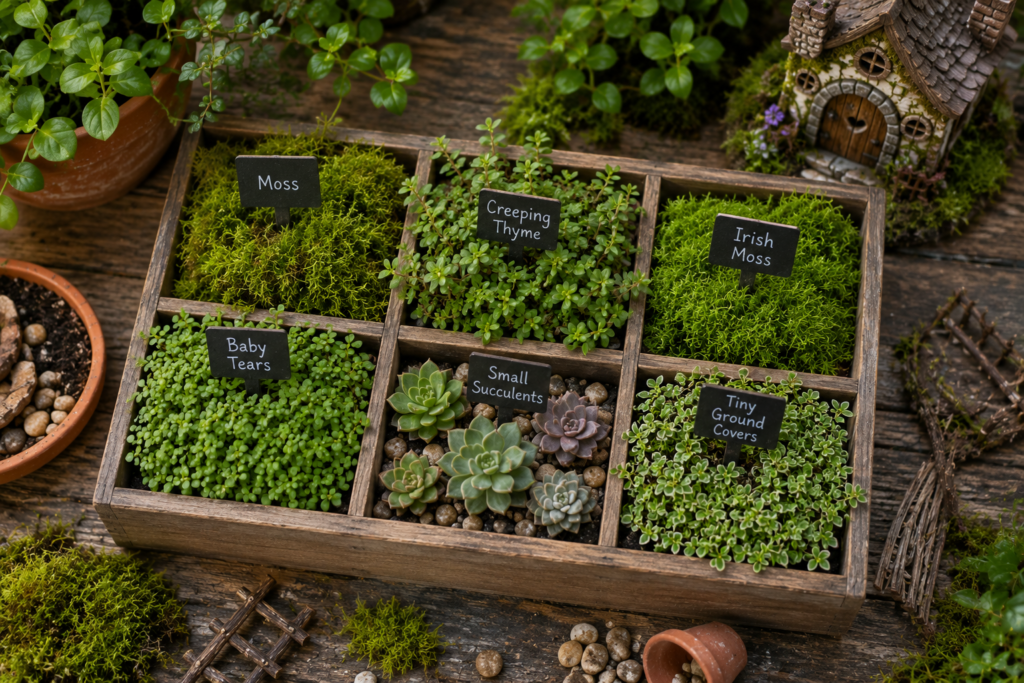
The best plants for a fairy garden are slow-growing, compact varieties that hold their tiny scale for months instead of taking over. After three years of trial and error, these are the ones that have consistently kept my tiny garden looking like a tiny garden instead of an overgrown pot:
- Moss stays low, spreads slowly, and looks like a tiny lawn
- Creeping thyme: compact, fragrant, and easy to trim
- Irish moss: dense, cushiony texture that reads as “miniature grass”
- Baby tears have a delicate look and work well in shaded or indoor fairy gardens
- Small succulents ideal for sunny outdoor containers, very low maintenance
- Tiny ground covers (dwarf varieties): check the mature size before buying; “dwarf” doesn’t always mean slow-growing
Foliage and texture matter more than flowers here. Flowering plants photograph beautifully, but many grow fast, need frequent deadheading, or bloom for only a few weeks. I’d rather have a fairy garden that looks good for eight months than one that peaks for two weeks and then needs constant upkeep.
Indoor vs. Outdoor Fairy Gardens
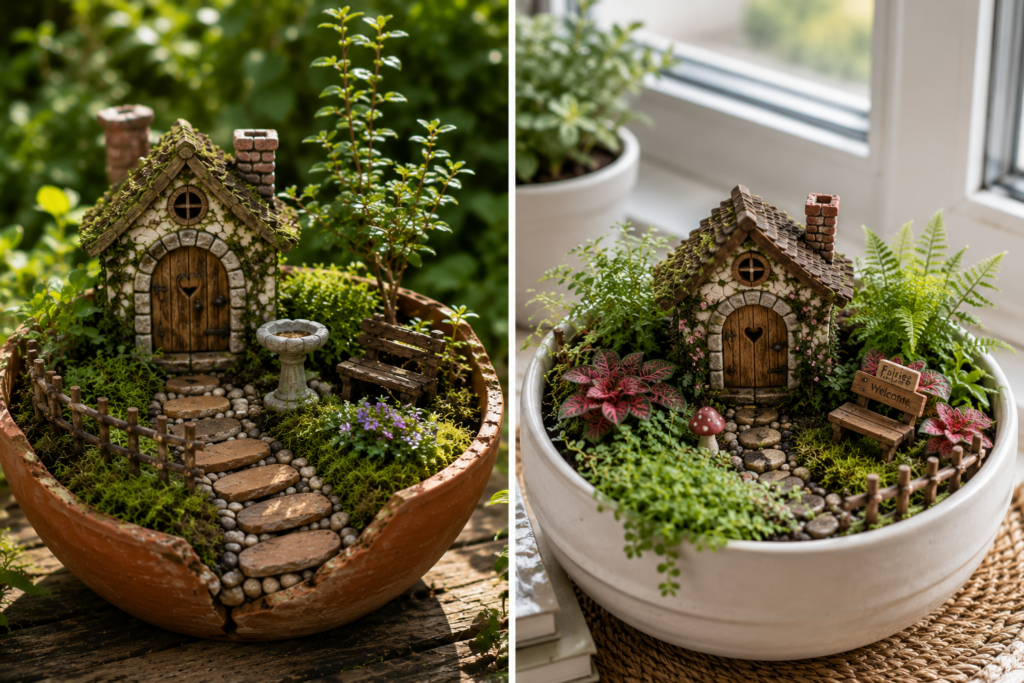
Both work well, but they need slightly different care.
Outdoor fairy gardens need real attention to sunlight; most of my plant choices do best with bright light or a few hours of gentle morning sun. In peak summer heat, I move containers somewhere they’ll get afternoon shade so they don’t dry out too fast.
Indoor fairy gardens are lower maintenance overall. Place the container near a bright window and rotate it about once a week so the plants grow evenly instead of leaning toward the light. I’ve also noticed that baby tears dry out noticeably faster on a windowsill near a heating vent, so I keep those containers a little farther from direct airflow.
Fairy Garden Maintenance
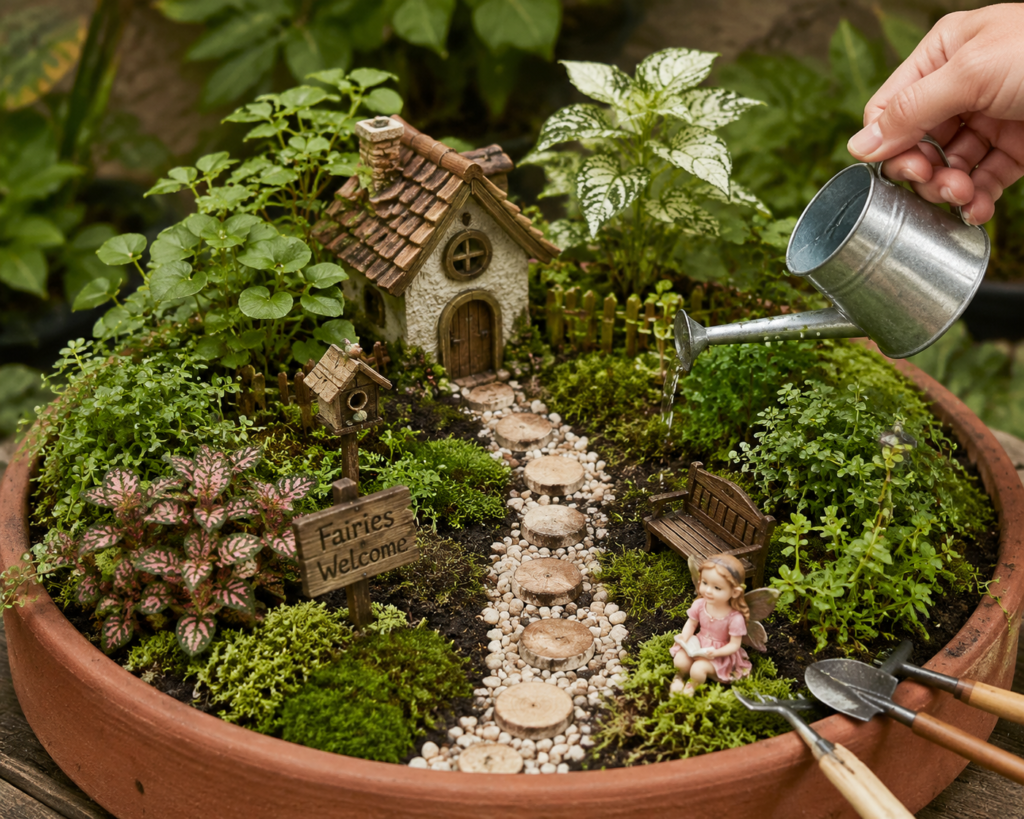
Fairy-garden maintenance really comes down to two things: watering only when the soil feels dry and trimming every couple of weeks. It isn’t a “build it and forget it” project, but it doesn’t need much either. I once let a patch of Irish moss go three weeks without a trim during a busy stretch, and it took a full ten minutes of cleanup to look tidy again – a good reminder that small, regular check-ins save far more time than occasional big ones.
- Watering: Check every few days rather than following a strict schedule. Water only when the top layer of soil feels dry. Shallow containers are easy to overwater, and that’s the fastest way to damage a fairy garden.
- Trimming: Every couple of weeks, snip back anything starting to creep over the path, house, or decorations. Even slow growers can lose their miniature look if you skip this for a month.
- Seasonal adjustments: Water more often in hot weather, much less in cooler months when soil stays moist longer.
- Refreshing: Most of my fairy gardens look their best for about a year before I refresh them, sometimes swapping a few plants, sometimes changing the theme entirely rather than rebuilding from scratch.
Five or ten minutes a week removing dead leaves, a quick trim, and checking the soil keep a fairy garden tidy for months. It’s much easier than trying to rescue one that’s been ignored for weeks.
Common Mistakes to Avoid
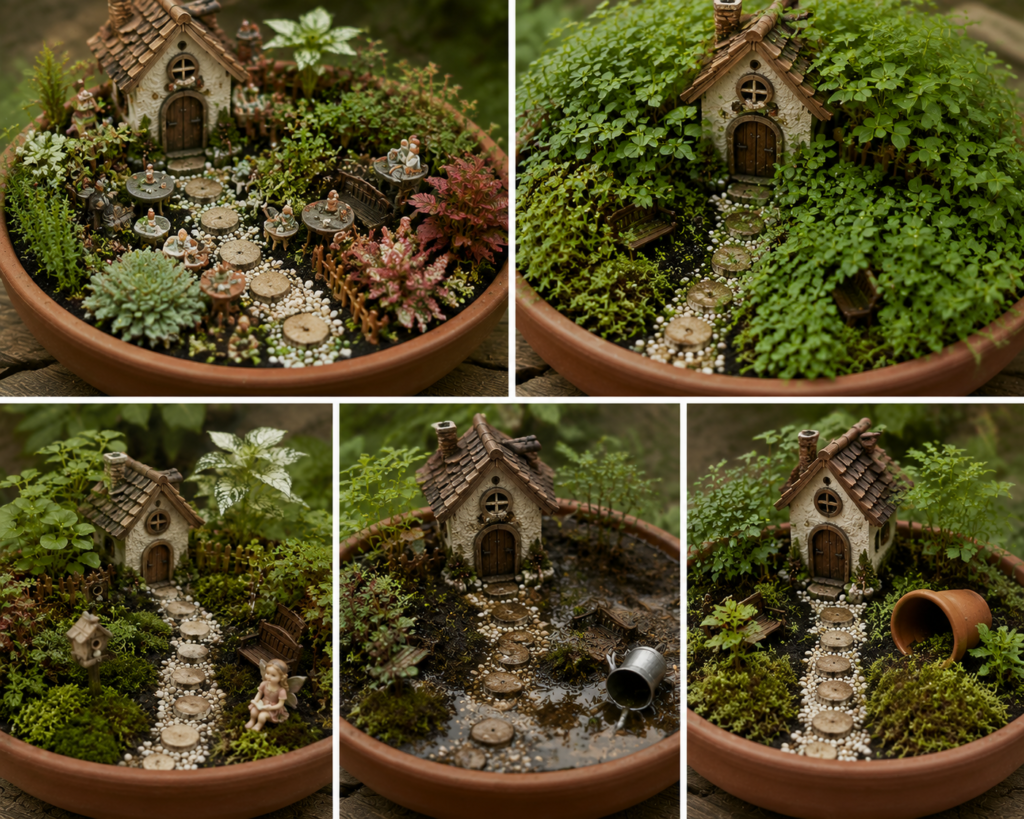
- Overcrowding the container. Too many decorations in one small space looks cluttered instead of magical. Leave open space on purpose.
- Choosing fast-growing plants. I once used fast ground cover because I wanted an instantly lush look. Within weeks it swallowed the path, covered the bench, and nearly hid the fairy house completely; it stopped looking like a miniature garden and just looked overgrown.
- Overwatering shallow containers. Fairy gardens dry out and get waterlogged faster than regular pots because there’s less soil volume.
- Skipping regular trims. Even “slow” plants need occasional trimming to stay in proportion.
- Buying an expensive kit before you need one. You can build a full fairy garden using stones, twigs, bark, and even bottle caps you already have.
My Honest (Slightly Unpopular) Opinions on Fairy Gardens

After three years of doing this, a few of my views run against what you’ll see on social media:
- You don’t need expensive miniatures. Some of my favourite fairy gardens used things I already had: garden stones, twigs, bark, and even bottle caps hidden under moss. The plants should be the star, not the decorations.
- Flowers aren’t essential. They photograph well, but foliage and texture hold up far longer with far less work.
- Perfect isn’t the goal. A slightly uneven path or a handmade twig fence usually gives a fairy garden more character than something that looks store-bought.
If I had to point to one project that shaped how I build fairy gardens now, it’s that first broken terracotta pot – imperfect, inexpensive, and still one of my favourites three years later.
Frequently Asked Questions
Do I need a special container to make a fairy garden? No. Any shallow container with drainage works, like terracotta pots, ceramic bowls, wooden boxes, and even old buckets, all make good fairy-garden containers.
What are the best plants for a fairy garden? Slow-growing, compact plants like moss, creeping thyme, Irish moss, baby tears, and small succulents hold their miniature look the longest.
How often should I water a fairy garden? Check the top layer of soil every few days and water only when it feels dry. Shallow containers dry out fast but are also easy to overwater.
Can I make an indoor fairy garden? Yes. Indoor fairy gardens do well near a bright window and are generally lower maintenance than outdoor ones; just rotate the container weekly for good growth.
How long does a fairy garden last before it needs to be redone? In my experience, it needs a refresh about a year before, though you can often update a few plants or decorations rather than rebuilding the whole thing.
Why did my fairy garden plants take over the whole container? This usually happens with fast-growing ground covers. Switch to slower-growing varieties and leave more open space than feels necessary at first.
Do I need to buy a fairy garden kit to get started? Not at all. Natural materials like stones, twigs, and bark combined with a few healthy plants usually look better than a container packed with store-bought pieces.
Final Thoughts
Learning how to make a fairy garden doesn’t require a kit, a big budget, or a perfect plan; it requires a container, a few slow-growing plants, and a willingness to let the design evolve. Some of my best fairy gardens started as small, imperfect experiments, and that’s exactly how I’d encourage any beginner to start: with what you already have and room to adjust as you go. Every fairy garden I’ve built has taught me something the last one didn’t, and yours will too so don’t wait for the “right” materials. Grab a container, plant something small, and let your first fairy garden be a little imperfect. It only gets easier from here.

- How to Make a Fairy Garden: The Easy Beginner’s Guide (Step-by-Step)

- How to Start Seeds Indoors: The Complete Beginner’s Guide for Strong, Healthy Plants

- How to Make a Raised Garden Bed: The Easy Beginner’s Guide
- How to Grow Zucchini at Home: The Complete Beginner’s Guide for Big Harvests

- How to Grow Potatoes in a Bag: The Easy Beginner’s Guide to a Big Harvest

-

 Vegetable Gardening1 month ago
How to Grow Tomato Plants Successfully (Beginner’s Step-by-Step Guide)?
-

 Vegetable Gardening3 weeks ago
Why Your Chilli Pepper Plant Isn’t Producing Peppers (And How to Fix It)
-
 Vegetable Gardening1 month ago
How to Grow Pumpkins: The Complete Beginner’s Guide to a Huge Harvest
-

 Vegetable Gardening4 weeks ago
15 Best Veggies to Grow in Your Rooftop Garden for a Huge Harvest
-
 Beginner Guides1 month ago
Growing Vegetables at Home: A Beginner’s Guide That Actually Works
-

 Vegetable Gardening4 weeks ago
Creative Outdoor Planter Ideas for Small Yards, Balconies, and Patios
-
 Beginner Guides4 weeks ago
Grow Onions at Home: The Complete Beginner’s Guide to Bigger Harvests
-

 Beginner Guides3 weeks ago
🥒 How to Grow Cucumbers at Home Easily (Step-by-Step Beginner Guide)