
Vegetable Gardening
How to Store Potatoes: 7 Simple Tips to Keep Them Fresh Longer


For a while, I thought growing potatoes was the whole project. You plant them, you wait, you dig them up, and that’s it – job done. One of my early batches taught me otherwise.
That batch looked perfectly healthy when I put it into storage. Firm skins, nothing obviously wrong. But when I checked on it later, several potatoes had started sprouting, and a few had begun to soften. Nothing was rotten, and nothing about it was dramatic; it was a small, quiet sign that I’d treated storage as an afterthought instead of part of the process. The potatoes hadn’t been bad going in. They just hadn’t been given the right conditions to hold up over time.
How to store potatoes properly matters just as much as growing them in the first place. The harvest isn’t really the finish line. What happens in the days and weeks after digging them up decides whether you get to enjoy that harvest for months or end up tossing out potatoes you worked hard to grow.
How Do You Store Potatoes?
To store potatoes properly, let them dry without washing, sort out any that are cut or bruised, cure them for about a week in a dark, ventilated spot, then keep them in a breathable container somewhere cool, dark, and dry. Check on the batch every so often so anything softening or sprouting can be removed before it spreads.
That’s the short version. Here’s how the process actually plays out.
The Harvest-to-Storage Process

Storage doesn’t start once potatoes are sitting in a box. It starts the moment they come out of the ground.
Once potatoes are dug up, I try to handle them as little as possible. Bruising happens more easily than people expect, and every bit of rough handling is something a potato has to recover from before it goes into storage. I leave them out so the soil on the skins can dry rather than rushing them straight into a box. I don’t wash them beforehand if they’re particularly dirty; once dry, I’ll gently brush off the loose soil by hand rather than rinsing it away. Washing right before storage just adds moisture back in, and moisture is exactly what you’re trying to avoid at this stage.
Next comes sorting. I go through the whole batch by hand and pull out anything with cuts, bruises, or soft spots. It’s an easy step to rush through when you’re eager to get everything put away, but a single damaged potato can drag down the ones sitting next to it. Taking the extra few minutes to look each one over has been worth it more times than I can count.
What’s left cures for roughly a week somewhere dry, dark, and ventilated. I spread the potatoes out rather than piling them deeply, partly because it keeps air moving around them and partly because it makes it easier to notice a problem potato before it has a chance to affect the rest of the pile. This is a step I used to treat as optional early on, mostly because it felt like an extra chore standing between me and getting the harvest put away. It isn’t optional if you want potatoes to hold up over time.
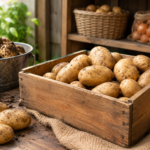
After curing, the potatoes move into a cardboard box or crate — nothing specialised, just something that lets air pass through. I don’t pack them in tightly, and I avoid anything that would trap moisture against the skins. From there, it’s mostly a matter of checking in on the box from time to time and removing anything that starts softening, sprouts heavily, or otherwise looks like it’s on its way to going bad.
How to Store Potatoes for Longer: 7 Simple Tips

1. Don’t Wash Potatoes Before Storage
Washing feels like the tidy thing to do right after digging, but moisture sitting on the skin is one of the fastest routes to soft spots. I brush off dried soil instead of rinsing it away and save the actual washing for right before cooking, when it no longer matters how much moisture ends up on the surface.
2. Check and Sort Potatoes for Damage
Give each potato a quick look before it goes anywhere near long-term storage. Cuts, bruises, and soft spots don’t belong in the long-term pile, even if the rest of the potato looks perfectly fine. Leaving a damaged one in is often how a single bad potato ends up affecting several others sitting around it.
3. Cure Potatoes First
A week or so in a dry, dark, ventilated spot lets the skins toughen up before the potatoes go into longer-term storage. It’s a step that’s easy to skip when you’re eager to just get the harvest put away and move on, but it makes a real, noticeable difference in how well the batch holds up afterward.
4. Keep Them Somewhere Cool and Dark
Darkness helps prevent greening, which is worth avoiding on its own. Cool temperatures help slow down both sprouting and spoilage. Between the two, this is probably the single biggest factor in how long a batch of stored potatoes actually lasts.
5. Give Them Room to Breathe
However you store them, don’t pack the container tightly. Airflow matters just as much as the storage spot itself — potatoes crammed together tend to hold onto moisture, and that’s usually where trouble starts, even in an otherwise cool and dark spot.
6. Skip the Plastic Bags
I tried storing potatoes in plastic bags once, mainly because it was convenient at the time. The trapped moisture led to soft spots showing up sooner than I expected, and the batch didn’t keep nearly as long as I’d hoped. Since then, a cardboard box or crate — something the potatoes can actually breathe through — has worked better for me.
7. Check on Them Every So Often
This is the tip that’s easiest to skip, but it might be the most useful one on this list. It only takes a couple of minutes to look through the box and pull out anything that’s heavily sprouting or starting to soften, removing it from the batch entirely rather than leaving it in with the rest. Catching a problem early like this has saved a good part of more than one batch for me over the years.
Taken together, none of these seven tips are complicated on their own. What actually makes the difference is doing them consistently, rather than looking for one clever trick to replace the basics.
A Few Things I Do Differently From Common Advice

Plastic bags come up often as a quick storage option, but in my experience they trap moisture in a way that speeds up spoilage rather than preventing it. I’d rather deal with a slightly less tidy setup than lose potatoes to soft spots.
I also don’t rely on the refrigerator for a full batch. Cold on its own hasn’t been the deciding factor for me — for storing a larger quantity, a cool, dark, dry room has simply worked better than fridge space in my experience. That’s a personal preference based on what’s held up for me, not a claim that a refrigerator can never be used.
Onions and potatoes get stored separately in my setup as well. I haven’t noticed any advantage to keeping them together, so I just give each its own space.
None of this is meant to override what works for someone else. It’s simply what’s held up for me, batch after batch, compared to some of the shortcuts I’ve come across.
The Lesson From That Early Batch

That batch — healthy-looking going in, sprouted and slightly soft coming out — is really why I pay attention to any of this now. At the time, I figured the hard part of growing potatoes ended once they were out of the ground, and storage would more or less take care of itself.
It didn’t, and that’s the part that stuck with me. Nothing about fixing it was complicated — curing properly, sorting out damaged potatoes, giving the batch airflow, keeping it dark and cool, and checking on it now and then. It just meant treating storage as part of the job rather than something that happens on its own after harvest.
FAQ
Should I wash potatoes before storing them? It’s better not to. Washing adds moisture right before storage, which raises the chances of soft spots. Brush off dried soil instead.
How long should potatoes cure before storage? About a week in a dry, dark, ventilated spot is generally enough to toughen the skins before longer-term storage.
Can I store potatoes in the refrigerator? You can, but for a larger batch, a cool, dark, dry room has worked better for me than relying on fridge space.
Can potatoes be stored in plastic bags? In my experience, sealed plastic traps moisture and can lead to soft spots sooner than expected. A breathable container like a cardboard box has worked better for me.
Should potatoes and onions be stored together? I haven’t found any advantage to it. Storing them separately, each in its own suitable conditions, is the approach I’ve stuck with.
How do I know if a stored potato has gone bad? Watch for sprouting, softening, wrinkled skin, or an off smell. Checking the batch every so often makes it easy to catch these early, before they spread to others.
How long can properly stored potatoes last? With proper curing, suitable conditions, and regular checking, potatoes can last for several weeks to a few months, depending on the variety and how consistently the storage conditions are kept.
Final Thoughts
A good potato harvest doesn’t end the moment you dig the potatoes up — that’s the part I got wrong early on, and it’s what that sprouted, slightly soft batch taught me. Storage doesn’t need a fancy setup. It just needs a bit of attention: curing properly, sorting out anything damaged, keeping things cool, dark, and dry, providing airflow, and checking on the batch occasionally.
That small amount of care afterward is the difference between a harvest you actually get to enjoy for weeks and one you end up throwing half of away.

Brussels sprouts weren’t the easiest vegetable I’ve grown, and honestly, that’s part of why I wanted to try them. After growing some of the quicker, more forgiving crops in my raised bed, I was curious whether I could actually pull off a decent home harvest of Brussels sprouts instead of just buying them from the store. What kept me hooked wasn’t the sprouts themselves at first; it was watching the plant change over the season. It starts out looking like a fairly ordinary, unremarkable leafy plant, and then, almost unexpectedly, little sprouts begin forming all along the main stem. That transformation is what makes growing Brussels sprouts genuinely interesting, even before you get to eat any of them.
If you’re wondering how to grow Brussels sprouts yourself, I’ll be upfront: this isn’t a “plant it and forget it” vegetable. It asks for a bit more attention to timing, spacing, and watering than some of the easier vegetables out there. But none of that care is complicated once you understand what the plant actually needs, and that’s exactly what I want to walk you through here, mistakes included.
How to Grow Brussels Sprouts: Quick Answer
To grow Brussels sprouts, start seeds indoors so you can control timing, then move seedlings to a sunny spot with compost-rich, well-draining soil, spacing plants 18–24 inches apart. Keep the soil consistently moist, feed lightly as they grow, and harvest the firm sprouts from the bottom of the stalk upward as they mature.
Choosing the Right Growing Spot

I grow my Brussels sprouts in a raised bed, which gives them the room they need to develop properly. Brussels sprouts are big plants; by the time they mature, the leaves spread out much more than you’d expect from looking at a young seedling, so whatever spot you choose needs to offer enough space and consistent sunlight. A raised bed also made it easier for me to manage the soil quality and drainage, both of which turned out to matter more than I initially assumed.
When to Plant Brussels Sprouts

This is where I learnt my first real lesson. Brussels sprouts need a long growing period, but they don’t like the hottest part of the season at all. If you start too late, the plants end up trying to mature during uncomfortably warm weather, which isn’t ideal. If you start too early, there’s a risk that warm weather is still hanging around when the plants are trying to get established.
Timing turned out to matter far more than I expected going in. It’s not something you can eyeball casually. Brussels sprouts want a long runway to grow, but they want to spend the bulk of that runway in cooler conditions, not the heat of summer.
In practice, that means working backward from your local growing season rather than following a fixed date. Brussels sprouts generally need somewhere in the range of three to four months from seed to harvest, and they mature best when the later part of that period when the sprouts are actually forming and filling out lines up with cooler weather rather than peak heat. So the general rule I go by is: start seeds indoors early enough that the seedlings are strong and ready to move outside once the worst of the heat has passed, and time things so the plants are heading toward maturity as temperatures start cooling down, not warming up. Wherever you’re gardening, that’s the planning question worth answering first, not “What date do I plant?” But “When will this plant be filling out its sprouts, and will the weather be on its side at that point?”
Starting Seeds or Planting

I started my Brussels sprouts from seed rather than buying transplants. I prefer starting from seed because it lets me control the timing myself and actually watch the plants develop from day one, rather than starting partway into their life. It takes a bit more patience up front, but I like having that control over when everything gets going.
I start the seeds indoors in trays or small pots, keeping the soil consistently moist while they germinate and grow into sturdy little seedlings. I sow them about a quarter to half an inch deep – deep enough to keep the seed in contact with moist soil, but not so deep that it struggles to push through. Once they’ve developed a few true leaves (not just the first small rounded leaves that appear at germination) and the weather outside isn’t punishingly hot, they’re usually ready to move out.
Before transplanting, I give the seedlings a few days to harden off, setting them outside for gradually longer stretches so they can adjust to direct sun, wind, and outdoor temperature swings instead of going straight from a sheltered indoor spot into the open bed. When it’s time to move them, I try to keep as much soil around the roots as possible and settle them into the ground at the same depth they were growing at in their tray, which seems to help them settle in with less stress. If you’d rather skip the seed-starting stage, transplants from a nursery work fine too; you’ll just have less control over exactly how the timing lines up, which is the main reason I stick with seed.
Soil Preparation

Before planting, I work plenty of compost into the raised bed. I’m not chasing a complicated soil mix; I’m mostly after texture. Good Brussels sprouts soil should be loose enough to drain properly but still hold moisture well, since these plants don’t do well with wildly inconsistent conditions at the root level. Getting that balance right before planting made everything afterward easier.
I work the compost in a few weeks before I plan to transplant, digging it into the top several inches of soil rather than just laying it on the surface. That gives it time to settle in and start improving the soil structure before the seedlings’ roots reach it. If your soil is heavier or compacts easily, adding a bit of coarse organic matter alongside the compost can help with drainage, but I’ve found that for Brussels sprouts, getting the compost right does most of the work on its own.
Brussels Sprouts Spacing

This is the mistake I’d flag first for any beginner, because I made it myself. When I first planted Brussels sprouts, I spaced them too close together. I was judging spacing based on how small the seedlings looked at the time, without accounting for how large they’d eventually get. The leaves ended up large and crowded, and I had to go back and thin out or adjust some of the plants.
Now I space Brussels sprouts roughly 18 to 24 inches apart, with enough room around each plant for good airflow and easy watering. That extra space makes a noticeable difference once the plants mature and start filling out. Don’t judge your spacing needs by what the seedlings look like on planting day; judge it by what a full-grown plant actually needs.
Watering Brussels Sprouts

I’ve found that Brussels sprouts do better with soil that’s consistently moist, rather than cycling between bone-dry and freshly soaked. My routine is simple: I check the top inch of soil with a finger and water when it’s dry, checking more frequently during warm or windy stretches. I’m especially careful about this once the sprouts actually start forming; letting the plants go through repeated dry spells at that stage isn’t something I want to risk.
When I do water, I water deeply rather than giving the plants a light sprinkle every day. A thorough soak that reaches down to the roots encourages the plants to grow deeper roots of their own, which makes them more resilient overall. Watering at the base of the plant instead of overhead also helps it keep the leaves drier, which in my experience makes them a little less inviting to pests and less prone to lingering dampness. A layer of mulch around the base helps too, since it keeps the soil from drying out as quickly between waterings.
Feeding Brussels Sprouts

My feeding approach is fairly low-key. I mix plenty of compost into the soil before planting as the foundation, then give the plants light feeding during their active growth periods. That compost does a lot of the heavy lifting on its own; it feeds the soil slowly over time rather than delivering one big hit of nutrients, and for a crop that’s in the ground as long as Brussels sprouts, that steady release is more useful than one strong feeding at the start.
Where I add a light additional feed, it’s mainly once the plants are established and growing actively, and again as the sprouts start forming, since that’s when they’re doing the most work. I try not to reach for fertiliser just because a plant seems to be growing slowly. Slow growth on its own isn’t necessarily a sign something’s wrong, and more fertiliser isn’t automatically the fix. Too much nitrogen in particular tends to push the plant into producing lots of leafy green growth at the expense of the sprouts themselves, which isn’t what you actually want from this crop. A light, balanced feed a couple of times during the season has worked better for me than trying to force faster growth with heavier applications.
Common Pests and Problems

I ran into two pest issues with my Brussels sprouts: small holes appearing in the leaves, which turned out to be cabbage worms hiding on the undersides, and aphids showing up on a few plants as well. My first mistake was assuming a bit of leaf damage wasn’t a big deal. I learned pretty quickly that regular leaf-underside checks catch problems while they’re still small and manageable.
For cabbage worms, I hand-pick them off and remove any leaves that are badly damaged. For aphids, a strong but gentle stream of water knocks them off effectively, and I keep an eye on new growth afterward. I’ve also found that checking in the cooler part of the day, in the morning, works well for me and makes it easier to spot both pests, since that’s often when they’re sitting still on the leaves rather than tucked away. One thing I’ve tried to avoid is overreacting to every small pest sighting. Regular inspection has done more for me than constant treating, and pulling out sprays or treatments for a handful of pests usually does more harm than good.
How the Sprouts Develop

For a while, the plant just looks like an ordinary leafy vegetable, and it’s easy to start wondering if anything is actually happening. That uncertainty was probably the hardest part for me early on. I kept checking the plants and second-guessing whether I was doing something wrong, simply because visible progress was slow.
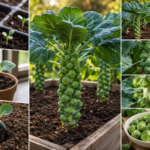
Eventually, the lower sprouts along the stem start firming up and filling out, and that’s the point where the whole thing clicks. Once I saw those first sprouts develop, I stopped worrying about day-to-day changes and started paying attention to smaller signals, whether sprouts were getting firmer, whether new ones were forming further up the stem, and whether the plant overall still looked healthy. That shift made a real difference in how much I actually enjoyed the process.
When Brussels Sprouts Are Ready to Harvest

I check my plants every few days once the sprouts start getting firm. Brussels sprouts mature from the bottom of the stalk upward, so the lowest sprouts are typically ready first. Rather than waiting for the entire plant to mature before harvesting anything, I pick the larger, firm sprouts as they’re ready and leave the smaller ones further up the stem to keep developing.
One common piece of advice you’ll come across is that you need to wait for a frost before harvesting Brussels sprouts. In my own experience, that’s not an absolute requirement. The first time I grew them, I kept watching the weather, unsure if I was picking too early without a frost. Eventually I tried a few sprouts that were firm and well-filled out, frost or no frost, and they tasted genuinely good. Later on, once the weather did turn cooler, I noticed the flavour got a little sweeter, so I understand where the frost advice comes from, and cooler weather does seem to help. I just don’t think it’s something you need to treat as mandatory. These days, I judge readiness by how the sprouts look and feel rather than waiting on a specific temperature.
How to Harvest Brussels Sprouts

I usually twist the sprouts off by hand, starting from the bottom of the stalk. If one is being stubborn, I’ll use a small knife instead of forcing it. I harvest a few at a time rather than taking the whole stalk at once; this lets me enjoy fresh Brussels sprouts over several weeks instead of ending up with everything at once.
The taste difference was one of the bigger surprises for me. Cooking sprouts soon after picking them was noticeably fresher and a bit sweeter than anything I’d had from the store. I wasn’t expecting that big a difference, and it’s one of the reasons I keep growing them.
What I Learned From Growing Brussels Sprouts

The biggest lesson for me was learning to stop judging the plant by day-to-day visual change. Early on, if the plant didn’t look much different after a few days, I’d start wondering if something was wrong. Eventually I realised that was just impatience talking. Once I started checking less obsessively and paying attention to smaller signs, instead of sprouts firming up and new ones forming, the plant staying healthy, everything got easier.
Brussels sprouts taught me that sometimes the most useful thing you can do in the garden is give a plant the care it actually needs, and then let it do its thing rather than trying to force or rush the process.
Common Mistakes Beginners Should Avoid

- Spacing plants too close together. Judge spacing by the plant’s mature size, not how small the seedlings look at planting time.
- Getting the timing wrong. Brussels sprouts need a long season but dislike hot weather, so plan around your local growing window rather than planting on impulse.
- Waiting for the whole stalk to mature before harvesting anything. Pick the firm, well-developed sprouts from the bottom as they’re ready, and let the smaller ones keep growing.
- Ignoring the undersides of leaves. Small holes in the leaves are often an early sign of cabbage worms, and catching them early makes a real difference.
- Assuming frost is mandatory before harvest. Judge sprouts by their firmness and size rather than treating frost as a strict requirement.
- Panicking over slow, uneven growth. Brussels sprouts take their time, and constant worry doesn’t speed anything up; consistent care does.
FAQ
How long do Brussels sprouts take to grow? Brussels sprouts are a slow crop, typically needing three to four months from seed to harvest. Growth can look uneventful for long stretches before the sprouts actually start forming, so plan around a long growing window rather than expecting quick visual progress.
Do Brussels sprouts need full sun? Yes, Brussels sprouts generally grow best with at least six hours of direct sunlight a day. A spot with consistent sun throughout the day supports stronger, more productive plants and helps the sprouts fill out properly.
How far apart should Brussels sprouts be planted? Roughly 18 to 24 inches apart works well. This gives the plants enough room to fill out fully, improves airflow around the leaves, and makes both watering and pest inspection easier as the plants mature.
Do you have to wait for frost to harvest Brussels sprouts? Not necessarily. Firm, well-developed sprouts can taste good before any frost. Cooler weather does tend to bring out a slightly sweeter flavour, so waiting until temperatures drop can improve the taste, but it isn’t a strict requirement; judge readiness by how the sprouts look and feel.
Why are my Brussels sprouts growing so slowly? Slow, gradual growth is normal for this crop, especially in the earlier stages, and doesn’t necessarily mean something’s wrong. Rather than assuming a problem, watch for smaller signs of progress, sprouts firming up, and new ones forming further up the stem instead of expecting dramatic day-to-day change.
How do you harvest Brussels sprouts? Start with the sprouts at the bottom of the stalk, since they mature first. Twist them off by hand, or use a small knife if they’re stubborn, and leave the smaller, less-developed sprouts higher up to keep growing. Harvesting gradually, a few at a time, lets you enjoy fresh sprouts over several weeks rather than all at once.
What pests commonly affect Brussels sprouts? Cabbage worms and aphids are the most common issues. Cabbage worms often hide on the undersides of leaves and are easiest to spot and hand-pick during the cooler part of the day, while aphids can usually be knocked off with a strong stream of water. Regular inspection of the leaf undersides catches them early, before they become a bigger problem.
Final Thoughts
Growing Brussels sprouts taught me more about patience than almost anything else I’ve grown. There were plenty of moments where I questioned whether the plants were doing anything at all, simply because the changes were so gradual. Once I let go of that day-to-day worrying and focused on giving the plants steady, consistent care instead, the whole process became a lot more enjoyable and a lot less stressful. If you’re thinking about growing your own, my advice is simple: don’t overcomplicate it, don’t panic when things seem slow, and trust that the sprouts will get there when they’re ready.

Asparagus is one of the few vegetables that asks you to think in years instead of weeks. When I first planted it, that took some getting used to, coming from a background of quick-growing leafy vegetables. It’s a perennial, which means the bed you prepare today can go on producing spears for many years to come if it’s given the chance to establish properly. That long view is exactly what makes learning how to grow asparagus so different from growing almost anything else in a kitchen garden, and honestly, it’s what makes it worth doing.
This guide walks through what I’ve actually learned growing asparagus from crowns in a raised bed: the planting process, the waiting period nobody warns you enough about, and how I decide when spears are ready to cut. None of it is complicated once you understand why each step matters.
Quick Answer: How to Grow Asparagus
To grow asparagus, prepare a permanent, well-draining bed with loose, compost-rich soil, then plant asparagus crowns in a shallow trench with roots fanned outward. Let the plants establish for the first couple of years without harvesting, keep the bed watered and weed-free, and allow the fern-like foliage to grow undisturbed. Once established, harvest spears selectively by cutting them close to the soil.
Why Asparagus Is Worth the Patience

The first thing to understand about asparagus is that it isn’t grown like a typical vegetable crop. You’re not planting something you’ll harvest in a few weeks and then pull out and replace. You’re creating a permanent bed that the plant will live in for years, becoming more productive as it settles in.
That was actually the appeal for me. I wanted to try something different from the usual quick-growing vegetables, and the idea of a crop that rewards patience rather than instant results was interesting. But it did mean adjusting my expectations. There’s no early harvest to look forward to the way there is with most vegetables. The first job is simply helping the plant establish itself.
Choosing a Permanent Location

Because asparagus stays in one place for so long, where you plant it matters more than it would for an annual vegetable. Look for good sunlight and good drainage, since asparagus roots don’t like sitting in waterlogged soil, and decent soil quality, since you won’t be reworking the bed every season the way you would with shorter-lived crops.
I grow my asparagus in a raised bed, mainly because it gives me better control over soil quality and drainage than working directly in the ground. It also makes it easier to avoid disturbing the roots later on, since you’re not sharing the space with other plants that need regular digging or replanting. Once asparagus is in, you want to leave it alone as much as possible, and a dedicated bed makes that far easier.
Preparing the Soil

Before planting, the bed needs to be in good shape, since you’re setting up conditions the plant will live with for years. I worked plenty of compost into the bed and made sure the soil was loose rather than compacted. Loose soil lets roots spread easily, and compost helps with both drainage and long-term fertility.
This doesn’t need to be complicated. The goal is simply a bed that drains well, isn’t compacted, and has decent organic matter worked through it. If your soil has large stones or hard compacted patches, it’s worth clearing those out now, since you won’t get an easy chance once the crowns are in the ground.
Choosing Crowns Instead of Seeds

Asparagus can be started either from seed or from crowns. A crown isn’t a mature plant; it’s the young, dormant root system of a one-year-old asparagus plant, grown specifically for planting. It looks like a small, spidery cluster of roots with a bud at the centre, and that bud is where the first shoots eventually emerge from. Seed is cheaper and gives more variety options, but it adds an extra year onto an already patience-testing process, since seedlings need time to grow into plantable crowns.
I chose to start from crowns rather than seeds because they’re an already-established young root system, which lets you skip the extra early growth stage that starting from seed requires. That’s not to say seed is the wrong choice for everyone, but if you’re a beginner and want to skip ahead a step, crowns are the more practical entry point.
How to Plant Asparagus Crowns

Planting crowns uses what’s usually called the trench method, and the sequence is straightforward:
- Start with the permanent bed already prepared, since you won’t get an easy second chance once the crowns are in.
- Dig a shallow trench along the bed.
- Place the crowns with their roots fanning naturally away from the centre, rather than bunched up.
- Cover with a light layer of soil to start, not too deeply all at once.
- As shoots grow, gradually add more soil rather than filling the trench in one go.
- Leave enough space between crowns for each plant to develop without crowding its neighbours.
In my raised bed, following that sequence made the whole process feel manageable rather than fussy.
One thing that caught me off guard was how unimpressive the crowns looked right after planting. They don’t look like much sitting in the trench, and it’s easy to wonder if you’ve actually done anything useful. That feeling didn’t last long, though. Once the first shoots broke through the soil, it became obvious why giving them a permanent, well-prepared bed mattered so much.
Establishing Asparagus in the First Two Years

This is the part of growing asparagus that tests patience the most, and it’s also the part that matters most for a strong bed later on.
In the first year, I was genuinely tempted to pick some of the early shoots. It feels strange to watch asparagus growing right in front of you and not use any of it. But I held back, because harvesting spears early pulls energy away from the plant at exactly the point when it should be building a strong root system instead. Those early years aren’t unproductive; the plant is doing real work below the soil, even if there’s nothing to put on a plate yet. I followed the same approach into the second year, letting the plants keep developing rather than treating the bed like a normal crop harvested whenever something looks ready.
During those early years, my focus was on the basics: keeping the bed weed-free, keeping the soil consistently moist, and maintaining good soil condition. I also let the fern-like growth develop fully instead of cutting it back while still green. That foliage is how the plant builds up energy reserves for the following season.
Looking back, the biggest lesson from those first two years is that they aren’t wasted time; they’re an investment. The waiting period was the hardest part of the whole process, but it made complete sense once I saw how much stronger the plants became by not rushing them.
Watering and General Care

Asparagus doesn’t need a complicated watering routine, but consistency matters, especially while the plants are establishing. What made the biggest difference for me was simply avoiding both extremes: not letting the soil dry out severely, but not leaving it waterlogged either. A steady, even moisture level is what the roots respond to best.
Beyond watering, care mostly comes down to keeping weeds under control so they’re not competing with the crowns and avoiding unnecessary disturbance once the plants are settled in. None of this requires constant intervention; it’s steady, unglamorous maintenance rather than any single dramatic step.
Understanding Asparagus Ferns

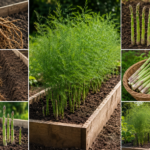
After the harvest period ends, the spears that aren’t cut will keep growing up into tall, feathery, fern-like foliage. It’s tempting to think this growth is just extra plant material that isn’t doing much, but it plays a real role. Those fern-like fronds are how the plant photosynthesises through the rest of the season, and that process is what rebuilds the energy reserves it will draw on to produce next year’s spears.
I make a point of leaving that green growth alone rather than cutting it back while it’s still active. Interrupting it early works against everything the plant is trying to do to prepare for the following season.
When and How to Harvest Asparagus

Once the plants are established enough to harvest, the way you judge readiness matters more than any fixed timeline. I look at the spears themselves rather than assuming everything is ready at once, watching for spears that are straight, firm, with tight, well-formed tips, and a useful thickness and height.
When cutting, I use a clean, sharp knife and cut the spear close to the soil surface, careful not to damage the crown underneath or any smaller spears just starting to emerge nearby. I prefer harvesting selectively, spear by spear, rather than treating the whole bed as ready on the same day. Not every spear reaches the same size at the same time, and I’ve found it easier to work through the bed gradually, cutting what’s ready and leaving the rest to catch up.
When to Stop Harvesting

Harvesting asparagus isn’t something you do indefinitely through the season. As a general rule, after several weeks of picking, spears tend to become noticeably thinner than they were earlier on, and for me, that’s the signal to stop.
Once that happens, I stop cutting and let the remaining shoots grow up into their fern-like foliage instead. Continuing to harvest past that point puts unnecessary pressure on the plant, pushing it to keep producing spears when it doesn’t have the reserves for it. Stopping in time gives it a better chance to rebuild its energy for the next season.
If there’s one lesson that’s shaped how I think about asparagus more than any other, it’s this: a good harvest isn’t about taking every spear you possibly can. Knowing when to stop is just as important as knowing when to start.
Common Mistakes to Avoid

Most of the trouble beginners run into comes down to a handful of avoidable habits:
- Harvesting too early. Cutting spears in the first year or two takes energy away from root development right when the plant needs it most.
- Choosing a poor permanent location. Weak drainage or too little sun makes everything harder later, since the bed is meant to last for years.
- Planting into compacted or poorly drained soil. Roots need room to spread and don’t do well sitting in waterlogged ground.
- Letting weeds compete with young plants. Weeds pull moisture and nutrients away from crowns still trying to establish themselves.
- Disturbing the bed unnecessarily. Repeated digging or rearranging works against the whole point of giving asparagus a settled, permanent space.
- Harvesting past the point of thinning spears. This weakens the plant instead of giving it what it needs to recover.
- Cutting back fern-like growth too early. That foliage is rebuilding energy reserves, and removing it while still green cuts that process short.
None of these are complicated to avoid; they mostly come down to resisting the urge to rush a plant built for the long game.
FAQ
How long does asparagus take to establish? Typically a couple of years after planting before it’s ready for a proper harvest. That’s when the plant builds the root system it will rely on for years of future spears.
Is asparagus difficult to grow? Not in terms of day-to-day care. Watering, weeding, and letting the foliage develop are all simple tasks. The long establishment period is what makes it feel harder than it really is. The challenge is patience, not skill.
Is it better to grow asparagus from crowns or seed? Both work. Crowns are an already-established young root system, so they let you skip the extra early growth stage and shave a year off the process, while seed offers more variety but asks for even more patience upfront.
Can asparagus be grown in a raised bed? Yes. A raised bed gives more control over drainage and soil quality and creates a defined, permanent space that’s easy to leave undisturbed once the crowns are established.
How do you plant asparagus crowns? In a shallow trench, with roots spread away from the centre. Cover with a modest layer of soil at first, then add more gradually as the shoots grow.
Should you harvest asparagus in the first year? No. The plant needs that time to focus its energy on root development rather than producing spears to cut.
When should you stop harvesting asparagus? A good general signal is when spears start becoming noticeably thinner. At that point, let the remaining shoots grow into fern-like foliage so the plant can recover its energy.
Why do asparagus plants turn into ferns? That growth isn’t wasted. It’s how the plant photosynthesises and stores up energy for a healthy crop of spears the following season.
Final Thoughts
Asparagus isn’t difficult because the care itself is complicated. It’s different because it asks you to think long-term in a way most vegetables don’t. The early waiting period, the seasons spent building roots instead of harvesting spears, is part of growing the crop, not time lost waiting for the “real” gardening to start.
What’s mattered most in my experience isn’t constant intervention. It’s good soil, sensible watering, weed control, letting the fern-like growth do its job, and knowing when to stop harvesting each season. Once you accept that asparagus rewards patience over fussing, the whole process feels a lot more manageable than its reputation suggests.

I never set out to become a coffee grower. It started as a simple question: could I actually grow coffee beans at home, the same way I’d grown vegetables in containers for years? I wasn’t looking for a fast crop or an easy win; I wanted to see whether a coffee plant could genuinely thrive in a home setting and eventually flower and produce cherries of its own.
That curiosity is what this article is built on. My plant is young, growing steadily in a container indoors, and hasn’t reached the flowering or fruiting stage yet. So rather than pretending I’ve already picked cherries and roasted my own coffee, I want to walk you through what growing coffee beans at home actually involves, combining what I’ve learned firsthand with the horticultural knowledge that fills in the rest.
Can You Grow Coffee Beans at Home?
Yes. How to Grow Coffee Beans at home starts with a young plant or a fresh seed placed in a well-draining container with a loose, moisture-retentive growing medium. Coffee plants need bright, indirect light, consistent watering without soggy soil, moderate humidity, and stable warmth. Growth is slow, and patience matters more than any special equipment. A healthy, well-established plant, not a fast harvest, is the real first goal.
Choosing Between Coffee Seeds and a Young Plant

You have two starting points: a seed or a young nursery plant. Both work, but they don’t take the same route to maturity. Starting from seed is the slower path; germination alone can take weeks, and the seedling then needs time just to establish itself before real growth begins. Treat the first year or two as pure foundation-building.
Starting with a young, already-established plant skips germination entirely and gives you a genuine head start. It’s still going to take years to reach flowering size, but you’re managing fewer variables while you’re still learning how the plant behaves. I’d recommend this route to most beginners.
How to Grow Coffee Beans From Seed

Not every coffee bean is a viable seed. Roasted coffee beans, the kind used for brewing, cannot germinate since roasting destroys the seed’s ability to sprout. What you need is a fresh, unroasted “green” coffee seed; freshness matters a great deal, since seeds lose viability fairly quickly once removed from the cherry.
Start with a small pot or seed tray with drainage holes, filled with a light, well-draining seed-starting mix. Plant the seed about half an inch deep, flat side down, and water gently so the mix settles around it. Keep the medium consistently moist during germination, but not waterlogged. Think of a wrung-out sponge rather than soaked soil, and provide steady warmth throughout. It’s genuinely slow by most gardening standards, and it’s common for nothing visible to happen for several weeks, so treat the wait itself as normal rather than a sign something’s wrong. Once a seedling emerges with its first set of true leaves, gradually ease off on how constantly moist you keep the mix and make sure it’s getting bright, indirect light rather than staying in a dim spot. From there, it grows on in that small pot until it’s established enough to move into a slightly larger container. Patience here is part of the process, not just a nice sentiment.
Choosing the Right Container

A coffee plant’s container matters more than people expect. The goal is a pot with proper drainage holes, sized to give the roots room to expand without being drastically oversized. An overly large pot might seem like it’s saving you a future repot, but excess soil around a small root system holds onto moisture longer than the roots can use, increasing the risk of waterlogging. Pot up gradually instead, moving into a container just one size larger once the current pot feels genuinely full of roots.
The Best Soil for Coffee Plants

Coffee roots need two things that can feel like they’re in tension: consistent moisture and access to air. A loose, well-draining potting mix that still holds some moisture strikes that balance. In a container this matters because there’s no surrounding earth to wick away excess water; whatever the pot can’t drain, the roots sit in.
Heavy garden soil is a poor choice for containers; it compacts and stays wet too long after watering, suffocating the roots rather than feeding them. A good coffee mix feels light and slightly crumbly when squeezed and lets water pass through rather than pooling on the surface.
Light Requirements

In its natural habitat, coffee typically grows under the shade of taller trees, which is a useful clue for how to treat it indoors. Weak light, such as a dim corner far from any window, slows growth and produces pale, sparse foliage. Harsh direct sunlight through unfiltered glass for hours at a time can scorch the leaves. What you want sits between the two: bright indirect light, with plenty of brightness in the room but no long stretch of direct sun hitting the leaves, usually easier to find indoors than gardeners expect.
How to Water a Coffee Plant

This is the section I probably have the most to say about, because it’s where I made my biggest mistake early on.
Coffee plants like consistent moisture, but consistent moisture does not mean constantly wet soil. When I started, I was watering as soon as the leaves looked like they wanted more, without actually checking the soil. The result was soil that stayed wet for far too long between waterings, and the plant’s overall health started to decline, growth slowed, and it just didn’t look as vigorous as it should have.
What actually fixed things was simple: letting the surface of the potting mix dry out slightly before watering again, then watering thoroughly and letting any excess drain away completely rather than sitting in a saucer. Instead of watering on a fixed schedule, I check the soil and the plant itself first, pressing a finger into the top inch or so of the mix. If it’s dry at that depth, water; if it’s still damp, wait.
That shift made a real difference. The plant recovered and started producing healthier new growth, and the lesson that stuck with me is that good drainage matters just as much as regular watering.
Humidity and Temperature

Coffee plants appreciate humidity, but that doesn’t mean turning a room into a greenhouse. I don’t mist constantly or keep the plant wet all day. I focus on keeping the surrounding air reasonably humid and avoiding a dry, stagnant spot. Grouping plants together, or standing the pot on a pebble tray with a little water beneath it (without the pot itself touching that water), are simple ways to nudge humidity up.
Temperature stability matters just as much. Sudden swings, cold drafts, or placement near a heating or cooling vent – a common mistake near frequently opened doors or drafty windows can stress the plant more than a slightly imperfect but stable environment would.
Feeding and Fertilising

Coffee plants generally benefit from feeding during their active growing period, when they’re putting out new leaves and can actually use the extra nutrients. Overfertilising is a more common problem than underfeeding, causing soft, weak growth rather than sturdy development. A light, balanced liquid fertiliser applied according to the product label is usually enough. Scale feeding back as growth naturally slows, particularly in cooler or lower-light periods. Signs of excess include a crusty white buildup on the soil surface, burnt-looking leaf tips, or a sudden flush of weak, floppy growth. If you notice any of that, ease off before adjusting anything else.
Repotting and Pruning

When roots appear at the drainage holes or circle tightly at the base, the plant is ready for its next pot. Move up just one size at a time with a fresh mix, rather than jumping into a much larger container. A pot that’s too big holds more moisture than the roots can use, which brings back the same waterlogging risk covered earlier. Expect a brief pause in growth while the roots settle into the new space.
Pinching back the growing tip once the plant reaches a reasonable height encourages bushier side growth rather than one tall, leggy stem, which keeps it easier to manage indoors. Beyond that, just remove damaged or yellowing growth as you notice it.
Common Coffee Plant Problems

A few issues come up repeatedly with home-grown coffee plants, and symptoms often overlap, so it helps to check the likely cause before reacting.
Yellowing leaves most often point to overwatering and poor drainage, though a nutrient issue is possible if watering habits look fine. Brown, crisp leaf tips usually mean dry air or inconsistent watering. Wilting can mean either too little water or, less intuitively, too much overwatered roots losing their ability to take up water properly, producing wilting that looks like drought stress, so check soil moisture before assuming the plant needs more water. Slow, leggy, or pale growth more often points to insufficient light than to coffee’s naturally unhurried pace. Sudden leaf drop often follows a temperature shock, such as a cold draft. Root damage from excessive moisture is the most serious issue here. This was my own mistake, and it’s prevented by adjusting watering habits and confirming the pot drains well. Pests, especially small insects on the undersides of leaves, are worth checking for; periodically wiping leaves down with a damp cloth or a mild insecticidal soap usually handles a small outbreak before it spreads.
The common thread across most of these problems is the same: consistency in light, water, and temperature solves more issues than any special product or intervention.
How Long Does It Take to Grow Coffee?

This is the question most people actually want answered, and it’s also where I want to be the most honest.
Growing coffee beans at home is not a quick-harvest project. The general journey runs from seed to seedling, seedling to a mature plant with enough established growth to support flowering, then flowering, cherry development, ripening, harvesting, processing, drying, and finally roasting; none of it can be meaningfully rushed.
A coffee plant grown from seed generally takes several years to mature enough to flower and produce its first cherries. A plant started from an already-established young nursery plant can reach that stage somewhat sooner, since it skips germination and the earliest seedling stages, but it’s still a multi-year process. Exact timelines vary with starting size, variety, and growing conditions, so treat any specific number, including these, as general guidance rather than a guarantee.
If you’re hoping for a harvest within the first year, this isn’t the right expectation to bring in. Getting a healthy, thriving plant should be your first real goal. Flowering, cherries, and eventually your own coffee beans come later, as the reward for patience rather than the reason to start.
From Coffee Flower to Cherry to Coffee Bean

It helps to understand what actually happens between a flowering coffee plant and the coffee you drink, especially since the phrase “coffee bean” causes some genuine confusion.
A mature, healthy coffee plant produces small white flowers. Once pollinated, those flowers develop into coffee cherries, small fruits that start green and gradually ripen, usually turning red depending on the variety. Inside each cherry are the seeds, and this is the part that surprises a lot of people: what we call a “coffee bean” is actually the seed found inside that fruit, not a bean in the traditional sense. A fresh seed just removed from the cherry is what you’d plant to grow a new coffee plant; that same seed after processing and drying but before roasting is a “green” coffee seed; and a roasted coffee bean, the final product used for brewing, can no longer germinate.
How to Harvest and Process Coffee Cherries

I want to be clear this section describes what lies ahead rather than something I’ve personally done, since my plant hasn’t reached that stage yet.
Once a home-grown coffee plant produces ripe cherries, harvesting typically means picking them once they reach a deep, ripe colour, rather than all at once, since cherries on the same plant don’t ripen together. From there, the seeds are removed from the surrounding fruit through one of a few processing methods, then properly dried before roasting. Only after roasting do they resemble the coffee beans you’d recognise from a bag or grinder. It’s a genuinely involved process, and one I’m looking forward to learning firsthand when my own plant eventually gets there. For now, my focus stays on the earlier stages.
Frequently Asked Questions
Can you grow coffee beans at home? Yes. A coffee plant can be grown at home in a container with the right light, soil, and watering routine; success is measured in steady, healthy growth rather than a quick harvest.
Can you grow coffee from a coffee bean? Only if that “bean” is actually a fresh, unroasted coffee seed. Roasted beans used for brewing cannot germinate.
Can coffee plants grow indoors? Yes, especially in a spot with bright, indirect light and stable temperatures, where humidity and temperature are also easier to control.
How long does it take to grow coffee? Generally several years to mature enough to flower and produce cherries, especially from seed; an established young plant may reach that stage somewhat sooner.
How often should you water a coffee plant? Water when the top inch or so of soil has dried out slightly, then water thoroughly and let excess drain away.
What soil is best for coffee plants? A loose, well-draining potting mix that still retains some moisture. Heavy garden soil compacts and stays too wet in a container.
Does a coffee plant need full sun? No coffee naturally grows under the shade of taller trees, so bright, indirect light suits it better than harsh, direct sun.
Can a coffee plant grow in a pot? Yes. Choose a pot with drainage holes and pot up gradually as the plant grows.
When does a coffee plant produce cherries? Only once it reaches sufficient maturity, typically several years in, with flowering first, then a further period for cherries to develop and ripen.
Final Thoughts
Growing coffee beans at home is absolutely possible, but it’s best approached as a long-term gardening project rather than a fast crop. The early years are about building a healthy, well-established plant, not chasing flowers or cherries before it’s ready for them.
If you’re starting your own coffee plant, focus on the fundamentals: good drainage, consistent but not excessive watering, bright indirect light, and stable conditions. The flowering, the cherries, and eventually your own home-grown coffee beans will come later and mean a lot more after watching the plant get there one season at a time.
- How to Store Potatoes: 7 Simple Tips to Keep Them Fresh Longer
- How to Grow Brussels Sprouts: A Slow, Patient Crop That’s Worth the Wait •
- How to Grow Asparagus: A Simple Guide to a Long-Lasting Harvest
- How to Grow Celery: A Simple Guide to Growing Crisp, Healthy Stalks
- How to Grow Peas: A Simple Guide for a Bigger, Better Harvest
-
 Vegetable Gardening3 months ago
How to Grow Tomato Plants Successfully (Beginner’s Step-by-Step Guide)?
-
 Vegetable Gardening2 months ago
Why Your Chilli Pepper Plant Isn’t Producing Peppers (And How to Fix It)
-
 Vegetable Gardening2 months ago
15 Best Veggies to Grow in Your Rooftop Garden for a Huge Harvest
-
 Beginner Guides2 months ago
Grow Onions at Home: The Complete Beginner’s Guide to Bigger Harvests
-
 Uncategorized2 months ago
How to Grow Zucchini at Home: The Complete Beginner’s Guide for Big Harvests
-
 Vegetable Gardening3 months ago
How to Grow Pumpkins: The Complete Beginner’s Guide to a Huge Harvest
-
 Beginner Guides2 months ago
How to Grow Cucumbers at Home Easily (Step-by-Step Beginner Guide)
-
 Vegetable Gardening2 months ago
How to Make a Raised Garden Bed: The Easy Beginner’s Guide